
When it comes to drywall screws, one size does not fit all. The use of a different type of drywall screw will depend on the thickness of the sheet of drywall, the type of wall studs you’re working with, and the ceiling height in the room.
The majority of drywall that most homeowners and do-it-yourselfers will be working on within light building projects is ½-inch, so that is the thickness we will focus on in this article.
The drywall screw length should generally be about 1-1/4 inches longer than the thickness of the sheetrock. So, for ½-inch drywall, you would want to use 1 1/4-inch or 1 5/8-inch drywall screws for attaching 1/2-inch drywall to wood studs. However, there are other factors to consider when choosing the length of drywall screws.
How Long Should Drywall Screws Be For ½-inch Drywall?
Factors To Consider
Aside from the drywall thickness, you’ll need to take into account certain factors when determining how long drywall screws should be. These include:

1. The Type of Wall Studs
If you’re working with wood studs, you’ll want to use wide-head nails that are at least 1-1/2 inches longer than the thickness of the drywall. This will ensure that the long screw head has a good grip on the wood and won’t pull out over time.
If you’re working with metal studs, you’ll want to decrease the screw length. This is because metal is much harder than wood, so the screw won’t have as good of a grip. A screw that is 1 inch longer than the drywall should be sufficient.
2. The Ceiling Height
Another factor to consider is the ceiling height in the room. If the ceilings are higher than 8 feet, you’ll want to use longer screws so that they can reach the studs.
For ceilings that are 8 feet or shorter, you can use shorter screws. This is because the weight of the drywall will be evenly distributed across the shorter length of the screw, making it less likely to pull out over time.
3. Popcorn Ceiling Joists
If you’re working with a popcorn ceiling, use screws that are at least 2 inches longer than the drywall. This is because the popcorn will add extra thickness to the drywall, making it more likely to pull away from the screw over time.
4. Diameter Of The Drywall Screw
When it comes to drywall screw diameter, the most common size is #6. This size will work for most applications. However, if you’re working with thicker drywall or you’re attaching the drywall to metal studs, you may need to use a larger diameter screw.
5. Type Of Screw Head
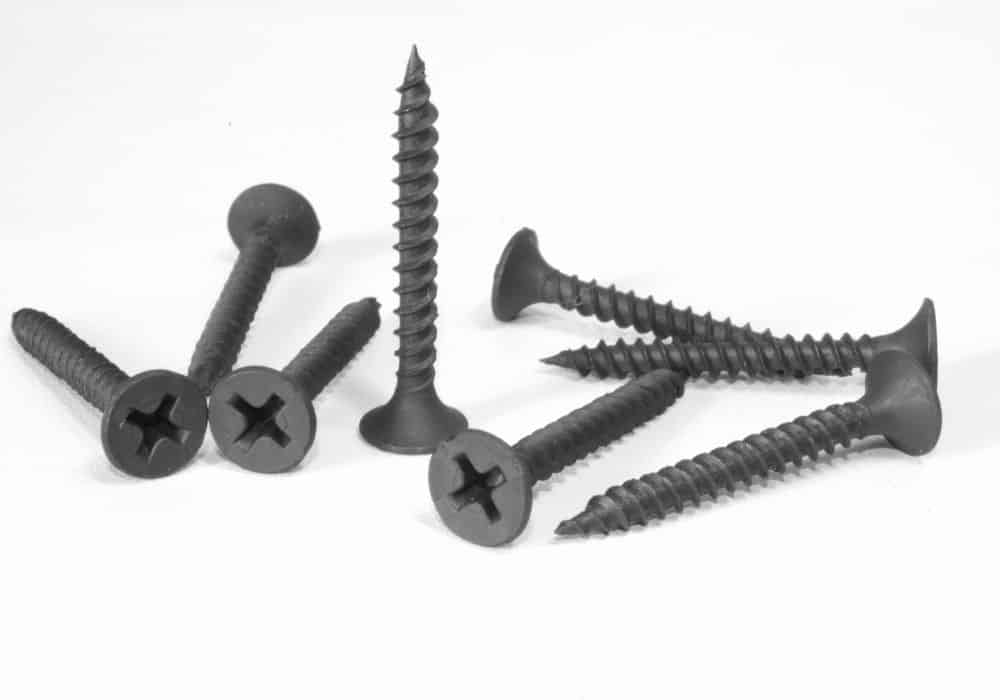
The type of screw head you use will also play a role in how long your screws should be. If you’re using a bugle head screw, for example, make sure the screw is long enough to penetrate the drywall and attach firmly to the studs.
6. Drywall Screw Thread Types
The type of drywall screw threads you use will also play a role in how long the screws should be. The most common type of drywall screw thread is the #2 Phillips head drill-driver bit, which is denoted by a cross-shaped indentation in the head of the screw.
The rate of threads per inch (TPI) will also be different for each type of thread. For example, Phillips coarse-thread drywall screws will have more threads per inch than fine-thread drywall screws.
Coarse-thread screws are typically used for attaching drywall to wood frames, while fine-thread screws also known as self-threading screws are used for attaching drywall to metal frames. The coarse threads bite into the wood more easily, while the fine thread drywall screws create a tighter grip on the metal.
When using drywall screws, ensure that the shank of the screw is long enough to penetrate through the drywall and into the framing material beneath and has sharp points. The minimum length you should use for a coarse-thread screw is 1-1/4 inches, while the minimum length for a fine-thread screw is 1 inch.
7. Drywall Screw Gauges
The gauge of a drywall screw is the thickness of the shank, and it’s measured in millimeters. The most common gauges used for drywall screws are 16, 18, 20, and 22. The gauge numbers tell you how thick the screw is, with a higher number meaning a thicker screw.
The most common type of drywall screw is the 16-gauge screw. This screw is typically used for attaching 1/2-inch drywall to wood studs.
If you’re working with thicker drywall, you may need to use a stronger screw. For example, a 20-gauge screw can be used for attaching 5/8-inch drywall to wood studs.
No matter what type of drywall screw you’re using, make sure that the length of the screw is appropriate for the thickness of the drywall and the material you’re attaching it to.
By taking these factors into account, you can be sure that your screws will provide a secure hold without damaging the drywall.
If you’re unsure of which type of drywall screw to use, it’s always best to consult with a professional. They will be able to help you choose the right screw for your project and ensure that it is installed correctly.
When it comes to choosing the right drywall screw, consider all of the factors involved to ensure a successful installation.
Standard Method Of Installing Drywall Screws
Once you’ve determined the right length of screw to use, you’re ready to start installing them. Here’s a quick overview of the installation process:
- Start by attaching full or partial sheets of drywall to the wall studs using screws that are 1-1/4 inches long.
- Make sure that the screws are driven into the studs at a slight angle so that they grip the wood securely and do not pop out over time. Self-drilling drywall screws or “Teks” are the best type of screw to use for this.
Self-drilling screws mean that the sharp point of the screw will pierce through the outer paper layer of the drywall paper about three-quarters of the way and into the wood studs without the need for drywall anchors or a pilot hole. This saves time and makes the installation process easier.
- If you’re working with metal fasteners, use a shorter screw. Metal is much harder than wood, so the drywall nails won’t have as good of a grip.
- Use a power drill to drive the screws into the studs. Be sure to use a screwdriver bit that is the same size as the screws you’re using. Ensure that the screws are not over-tightened to prevent cracks.
- Adjust drill torque so that the screw is driven in flush with the surface of the drywall but not so tight that it pulls the paper.
- As you’re installing the screws, be sure to space them evenly across the drywall. This will help to distribute the weight of the drywall evenly and prevent nail pops out over time.
- Once all of the screws are in place, you can cover them with a joint compound and finish the wall as desired.
- Once all of the screws have been installed, you’re ready to move on to the next step in your project.
It’s important to note that the length of the screws you use will vary depending on the thickness of the drywall.
For example, if you’re using ½-inch drywall, you’ll need to use 1-1/4 inch screws. However, if you’re using 3/4-inch thick drywall, you’ll need to use 1-5/8 inch screws.
Drywall Installation Tips
Here are a few tips to keep in mind when installing drywall screws:
- Use cordless drills with an adjustable speed to drive the construction screws into the studs in an effortless manner. This will make the process go much faster and will help to avoid stripped screws.
- You can also use a compact screw gun, a specialty tool for driving in the screws, but make sure that the gun is set to the correct speed.
- If you encounter mysterious circular bumps while moving into a new house, it’s likely that they were made by popping drywall screws. To avoid a nail-pop problem later, always use screws that are long enough to go through the entire thickness of the drywall.
- Be careful not to over-tighten the screws. This can cause the drywall to crack.
- Make sure that the screws are driven into the studs at a consistent depth. This will ensure that the drywall is evenly supported.
- For outdoor projects, use screws that are specifically designed for exterior use.
- Use a thin vinyl coating or black phosphate coating on the screws to help prevent rust. Black drywall screws also have a corrosion-resistant coating.
- Wear gloves when driving the screws to avoid getting blisters on your hands from metal burrs.
- Make sure to follow the local building code and home construction regulations when installing drywall.
How 1/2 Inch Drywall Is Perfect For Your Home
Drywall work, also known as plasterboard, is a type of wall paneling that is commonly used in the construction of homes and office buildings. Drywall is made of a gypsum core that is sandwiched between two sheets of heavy paper.
If you’re working on sheet metal or a light building project, 1/2 inch drywall is the perfect thickness for you. It is ideal to form curves without breaking and can be used in a majority of drywall moderate building tasks. 1/2 inch drywall is also the thickness most woodworkers use when creating walls for bathrooms, kitchens, basements, and attics.
When you purchase 1/2 inch drywall, it will come in standard 4-foot by 8-foot sheets. These sheets are then cut to size and hung on the walls using screws or nails.
However, for the fire code, 3/4 inch drywall or type-x drywall is required in high fire hazard locations such as furnace rooms and in garages to hinder the spread of flames in any potential fires.
While 1/2 inch drywall is the most common thickness of drywall used in construction, there are other thicknesses available for specific applications. For example, 5/8 inch drywall is often used in ceilings because it is less likely to sag over time.
3/4 inch drywall is also available and is often used in walls that will receive a lot of wear and tear, such as in high-traffic areas or in commercial buildings.
Final Thoughts
Drywall installation is a simple process that anyone can do with the proper tools and techniques. Just remember to use the right screws for the thickness of the drywall you’re using and to drive them in at a consistent depth. With a little practice, you’ll be a pro in no time!
For more information on home improvement, check out our other blog posts.