While dry fitting PVC pipe may work for a while, it doesn’t hold up well against pressure and often backs out over time. For a more permanent solution, you should consider glue suited or solvent cement specially formulated for PVC material.
By adhering or bonding PVC pipe together, you can create stronger structures and solve plumbing issues. In this article, we explain the difference between simple adhesion and more permanent bonding methods.
Keep reading to learn the most effective method for gluing PVC pipe.
Understanding PVC Glue
It’s important to understand that solvents for joining PVC pipe, such as PVC glue or PVC cement, differ from regular adhesives.
Normally, we think of glue as a means of adhering two objects together. If you use regular glues, such as gorilla glue, on a PVC pipe this is what you achieve, but the connection is not strong enough to hold up to time or pressure.
This may help if you want to hold two pieces of pipe together while you tend to something else, but it isn’t a long-term solution.
PVC glue causes a chemical reaction that melts the surface of the pipe so the two pieces join together. They are no longer independent pipes, and any modification to the joint requires cutting.
The process, cold welding, is strong enough to tackle more intense tasks such as household plumbing or the creation of weight-bearing structures.
Choosing a PVC Solvent
Any regular glue should work for temporary holds or crafty builds (i.e. children’s crafts), but try to pick something with a strong adhering reputation for greater results.
When choosing a solvent, make sure you choose one that works for the conditions of your project. Make sure you choose one specifically designed for PVC (Polyvinyl Chloride) and not ABS or CPVC. Each pipe material requires different chemicals for bonding.
You should also choose a cement body adequate for your pipe size. Generally, larger pipes require thicker solvents. Check the labels for the solvent rating, and verify it for either pressurized or non-pressurized projects.
The label also tells you ratings for certain conditions, such as:
- Temperature
- Moisture
- Pressure
Make sure these match the conditions of your application site, as well as whether the cement has approval for water systems or DWV (Drainage, Water, and Vent) systems.
Consider all other information on the label when making your decision. Different brands or compounds may have different application instructions and curing times, and one may work better for your project schedule.
Do You Need a Primer for PVC Glue?
It’s best to err on the side of caution with primer. Most PVC glues explicitly require it, and it usually doesn’t hurt to use primer.
PVC primer prepares your joint surface by cleaning it and enhancing the bond. It softens the PVC pipe to set the stage for cold-welding, and the softer the pipe is the better the bond will be.
This distinguishes it from PVC cleaner, which simply removes stuck on substances,. such as oil or grease, from the outside of the PVC pipes. While cleaner is still better than nothing, it will not soften the pipe to enhance the bond.
Most PVC primers are colored to provide visual perfection of their use. This not only reminds you of what you’ve already done, but it makes it easy for a building inspector to verify the use. It could be the difference between passing and failing an inspection.
If this isn’t something you need to worry about and you want a clean look, there are clear primers available.
Helpful Tools for Gluing PVC Pipe
Apart from your pipe, fittings, and PVC glue, it’s recommended to have:
- 80 grit sandpaper and/or a box cutter (for dealing with burrs)
- A pipe cutter, handsaw, or reciprocating saw (for cutting your pipe)
- A pipe holder
- A marker (for marking your joints)
- A brush (for the primer if it’s not included in the can)
Read through the precautions and instructions to determine which materials work best for you.
Safety Precautions When Gluing PVC Pipe
The solvents for gluing PVC pipe are strong chemicals, and they emit strong vapors that may make you dizzy or disoriented. Even if you do not notice an adverse reaction, these vapors are still dangerous for your health.
It’s important to work in an area with plenty of ventilation. Open a window if possible, and consider wearing an approved vapor respirator while you work.
Wear safety goggles, ideally those with side shields, to protect your soft membranes from emissions. Protective gloves help avoid skin contact that may lead to chemical burns, and you should address any drips on your skin as soon as possible.
Protect your work surface with a tarp or towel to prevent damage and make cleanup much more manageable when you’re done.
The Best Method for Gluing PVC Pipe
We’ll discuss the best method for gluing PVC pipe using a solvent binder. This differs from a simple swipe of glue, and involves:
- Gathering your materials before you start
- Ridding your PVC of rough edges and burrs
- Dry fitting your PVC pipe
- Priming your PVC pipe and setting it
- Allowing proper time to cure
The entire process takes about 3 hours, but this varies depending on your experience, the materials you have at hand, and the scope of your project.
1. Gather Your Materials
Make sure you have everything you need at hand before you start gluing anything. This includes:
- Your PVC pipe, cut to the right lengths
- Fittings
- A level (depending on your project)
- Primer
- PVC solvent
- Rags (for quick cleanup)
Consider having a way to cut the pipe (i.e. a pipe cutter or hand saw) and sandpaper on hand for making quick adjustments to your PVC project. We also recommend keeping additional pipe and fittings nearby so you aren’t rushing the store if you make a mistake.
2. Rid the PVC of Burrs
A pipe cutter makes the cleanest PVC cuts, whereas hand saws and recip saws usually tear it up a bit. The stray PVC, burrs, can cause snags and clogs inside the pipe as it catches hair or other debris.
Burrs left on the outside of the pipe make it more difficult to glue the PVC properly, and you may find the welding fails later after you think you’re done.
You can cut the burrs off using a box cutter, but 80 grit sandpaper does a better job. Roll the sandpaper into a tube, then flatten it to match the curve of your pipe.
Hold the paper at an angle to grind away at the burrs. Make sure you run it around the inside and the outside of the pipe completely, even if you don’t detect burrs in those areas.
This buffs the pipe and ensures a clean surface for gluing.
3. Dry FIt Your PVC
Dry fit your pipe prior to solvent application. This makes sure:
- Everything fits together properly
- Everything is the right length
- You know what you’re doing before you’re short on time
Use a torpedo level if needed to ensure alignment. This is also the perfect time to number your pipes and joints and make index marks for faster matching.
Dry fitting is like a dress rehearsal for pipe fitting. You don’t want to make any mistakes at this point, but it’s better to do it now so you can fix it before you’re under greater pressure.
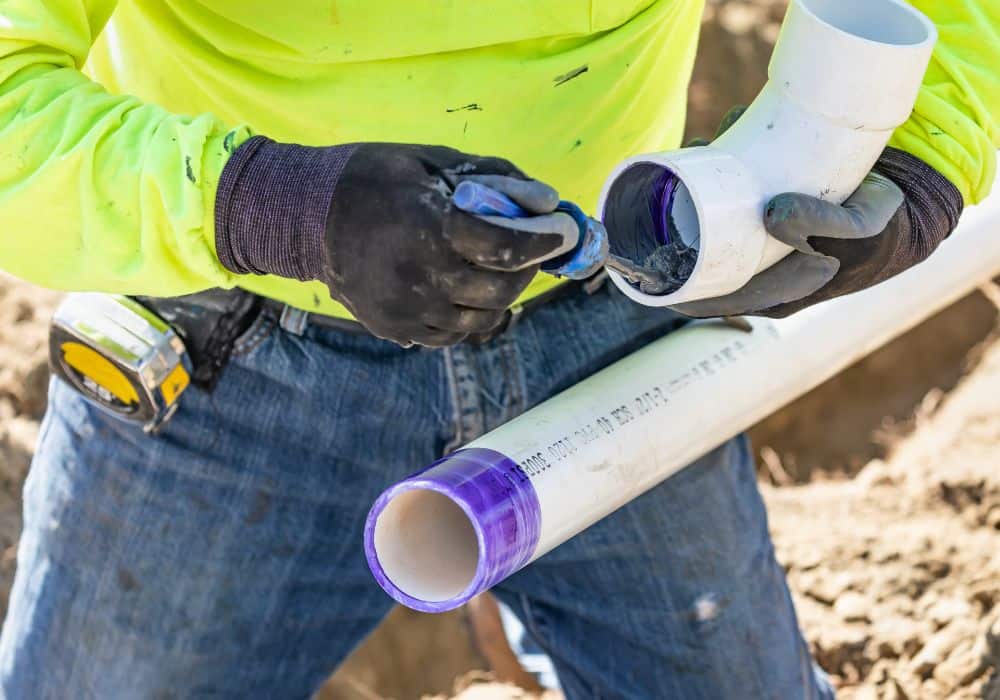
4. Prime the Pipe and Fitting
Read the instructions on your primer for specific instructions. Usually, this involves wiping the primer on the inside of your fitting and the outside of your pipe, then letting it dry for exactly 10 seconds.
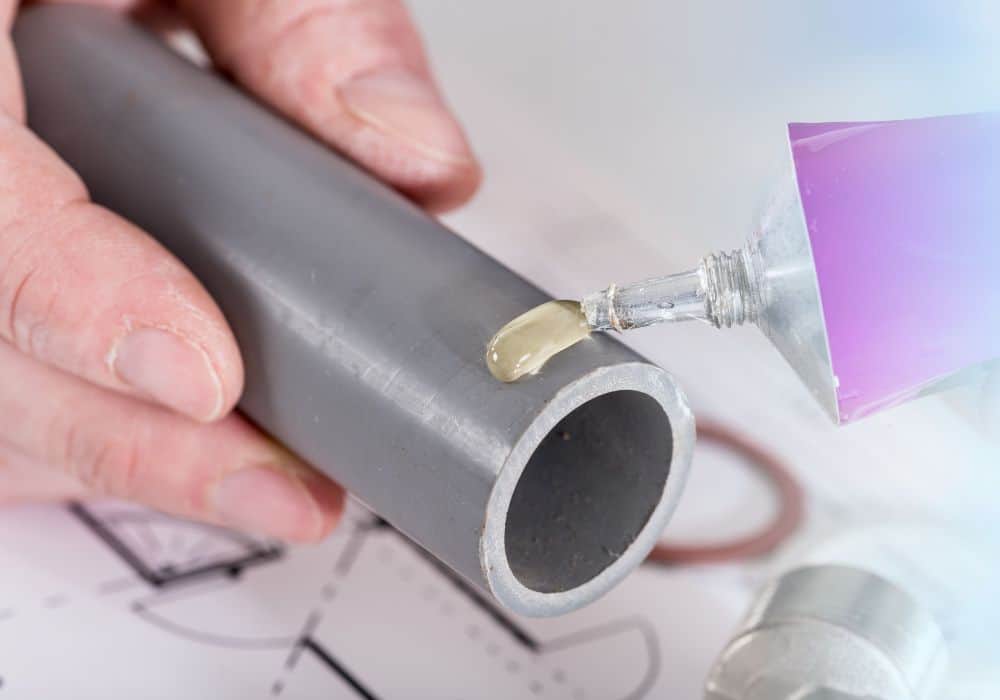
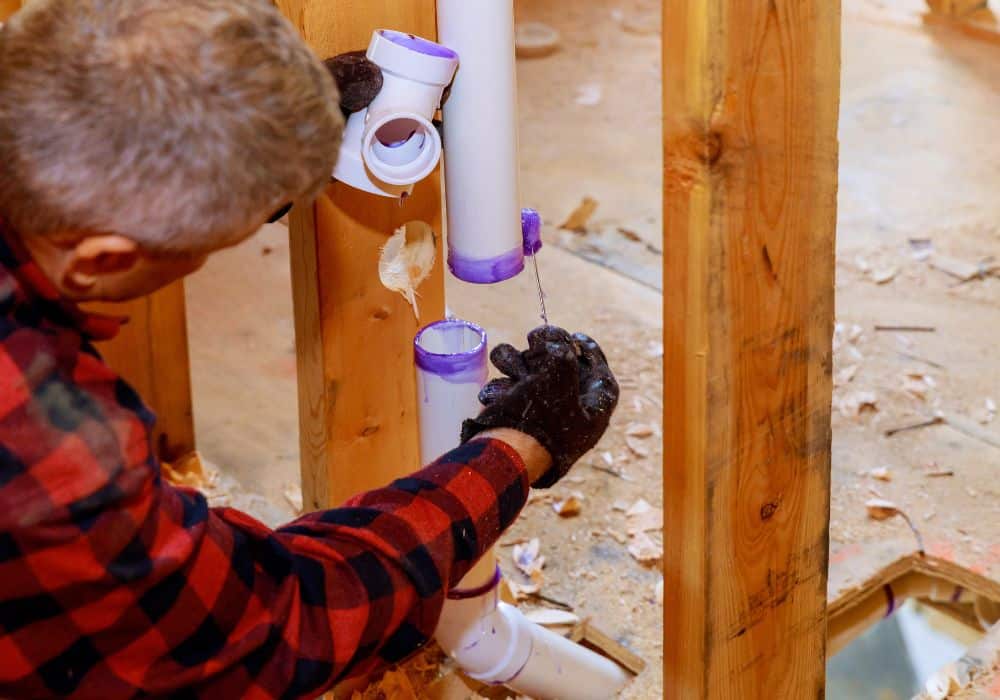
Immediately apply the solvent to the primed areas of your fitting and pipe, ensuring an even layer, then insert the pipe into the fitting.
Twist it slightly, about a quarter turn, then press the pieces together and hold them for about 15 seconds. This allows them enough time to set while preventing the pipe from backing out and creating a weak joint.
5. Allow Time to Cure
Most solvents cure in about 15 to 20 minutes before you should handle the pipes any further. It may also hold up to water pressure, but it’s best to wait until it fully cures to put the pipe back in business.
Most PVC should be ready to go in under 24 hours after gluing.
Dealing with PVC Gluing Mistakes
Because PVC glue modifies the surface of the pipe, it’s difficult to correct any mistakes you make.
To correct issues, you must see out the bad connection and use a coupling to rejoin the parts. You may need to use new parts, so it’s recommended to keep a few spares on hand.
Follow the same instructions for the original joint and ensure you do not repeat your original mistake.
Conclusion
While you can use regular glue on PVC pipe, remember that it’s unfit for bearing weight or pressure. It’s best to err on the side of caution and use an appropriate solvent to join PVC pipes.
Remember to:
- Gather your materials beforehand
- Clean your pipe surface
- Use primer
- Hold the pieces together
- Allow ample curing time
Are you tackling a project that requires you to glue PVC? Comment with any questions you have!