Showers aren’t a “maybe” for a home. They’re a must, and if you are doing your own installation, it can be a daunting task. One of the hardest parts is doing your own plumbing setup, including installing a shower drain pipe.
Did you ever wonder what it takes to install a shower drain on your own? It’s often a job that is better done by professionals, but if you want to try it yourself, you can. We have the inside scoop on how to do it.
Our guide will give you a quick walkthrough of an installation that occurs before you add a shower base. If you already have a base or have a concrete floor, you may need another guide or a call to a local plumbing company.
Tools
- A flat-head screwdriver
- Silicone sealant
- 2-inch shower drain assembly
- Shower pan of your choice
- PVC primer and cement
- 2-inch PVC pipe and PVCP-trap
- A PVC Y-fitting
- Markers
- PVC fittings
- Support hooks
- A tape measure
- A hacksaw or PVC handsaw
- A level
Step by Step Instructions
Now that we have gone over the basic tools, let’s get to the main show. You will have to install a P-trap as part of this process. Remember, this is not something you can skip doing. Legally speaking, every shower is required to have a P-trap.
1. Start by prepping the shower drain body
Remove the screws off the strainer of the shower drain assembly, and put a small drop of silicone sealant on the underside of the drain’s body.
2. Run the shower drain assembly through the shower pan
Push the shower drain through the not-yet-installed shower pan’s drain hole. Press on the drain assembly gently so that you can get the sealant to bond with the pan.
PRO TIP – Don’t be shy with the glue. If you are worried about leaks, wait for the sealant to dry then test it for leaks by running water around it.
3. Add the shower drain gaskets
Add the rubber gasket on the shower drain’s body, then follow up with the paper gasket. Hold the fixture in place by screwing a locking nut on the drain’s thread. A slip-nut wrench is the best tool for this, though some people have used pliers in a pinch.
PRO TIP – If you are using a compression-style drain, you will have a fitting tool that will make it easier to get that watertight seal. This drain setup will also involve a compression gasket and compression nut. Follow the instructions (if it comes with them) when you install this drain.
4. Find your waste pipe on the floor
Grab your Y-fitting and place it near the waste pipe. Use a marker to demarcate where the Y hubs end. Use the hacksaw to cut the marked piece of piping.
5. Glue the Y fitting to the horizontal waste pipe
You will need to add purple primer to the fittings and the Y hubs. Wait 10 minutes, then add PVC glue over the primer. Using your fingers, push the wye onto your waste piping’s outlet. Then, pull the other end of the waste piping back so it slides into the Y securely.
The large arm of the Y fitting should be horizontal, while the other portion should swoop upwards to meet the bottom of the pan. You want to grade the Y fitting downwards so that water will naturally flow towards the waste pipe.
6. Measure from the Y’s drainpipe fitting to the center of the shower’s drain location
The measurement you’re going to take is a horizontal measurement, not a vertical measurement.
You will then use the hacksaw to cut a piece of PVC tubing the same length. This will be the tube that sends water down to the Y fitting, which in turn, gets sent to the wastewater pipe.
PRO TIP – There’s a good chance that you may need additional fittings to navigate around obstacles in your shower area. If that’s the case, you may need to include the measurements for the curved PVC fittings in your main measurement.
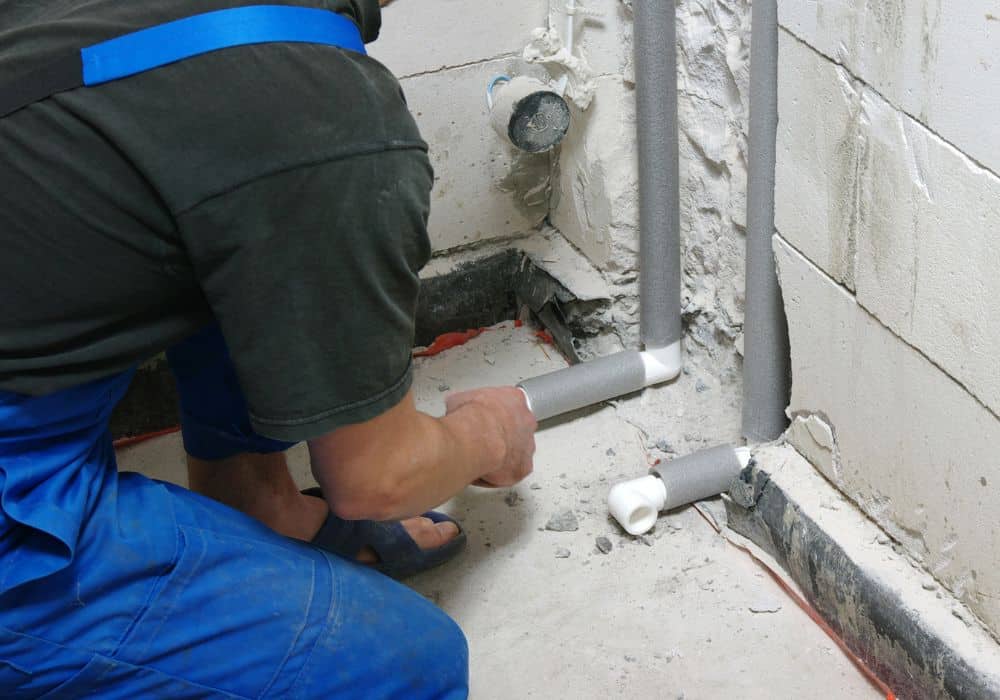
7. Weld the 2-inch PVC drain pipe to the Y fitting
You can “weld” it by applying primer, then applying glue to the pipe. Push it until it is glued to the fitting.
Add support hooks to help keep it in place every four feet. J-hooks can be added to your floor’s joists with a hammer.
8. Now, give the P-trap a test fit
Put the P-trap on the shower drain piping without gluing anything. Carefully rotate it until the 90-degree bend aligns with your waste drain piping. Use a marker to etch where the elbow meets the waste piping.
Cut the waste drain piping with a hacksaw.
9. Prime and glue everything down
With a brush, prime the end of the shower drain piping, the waste drain pipe, the bend, and the hubs of the U-shaped portion of the P-trap. Add PVC cement to the waste drain and the bend, then glue the two together.
Then, add glue to the U-shaped portion of the P-trap. Glue one end of the U to the shower drain and the other end to the bend. If you did this right, it should look like a “P” shape with the curved portion pointing towards the floor.
PRO TIP – Instructions can be a bit difficult to understand at first. Need a visual cue of what it is supposed to look like? Click here to see a traditional shower P-trap layout.
10. Finish the solvent welding
The last thing that you want to do is put together an entire plumbing circuit, only to find out that you have a ton of leaks. Add primer and cement around the exterior of the joints and let it dry to wrap up this part of your project.
Extended Tips

Whether it is in your basement or next to a master bedroom, adding a new shower drain tends to mean that you will need a little skill that is often best gotten through experience. That’s why it’s often best to hire a plumber if you don’t feel 100 percent ready to do this yourself.
These tips can help you make the most of your shower install:
- Buy more fittings than you think you need. You would be surprised at how many minor adjustments you may need to make just to make that shower drain plumbing work. It’s easier to have more fittings than less.
- If you have a concrete floor and cannot access the area under your drain or can’t quite get to the waste pipe, call a professional plumber. While it may seem to be a good way to save money at first, the truth is that plumbing is way harder than it looks.
- Before you install showers or tubs, check your local laws on DIY installs. Though it is rare, some areas ban installations done by individuals who do not hold a license. On a similar note, do not try to do this in a home you don’t own. An apartment owner can evict you for it.
- Most areas will use a 2-inch pipe for shower water, but if you are installing a tub, you may want a thinner pipe. Oddly enough, tub drains traditionally require a 1.5-inch diameter. It could be that the sewer gases P-traps prevent actually are easily trapped with all that extra water.
- It’s okay to do a test run of water before you seal your shower pan (and underside) off from everything else. A cup or two of soapy water poured down the drain you just set up can help reveal tons of little leaks and issues. Otherwise, you might start seeing leaks in the ceiling underneath your bathroom or water pooling near your drywall.
- Keep a visual chart of what your P-trap should look like when it’s done. While written directions are good, having a visual reminder of what your finished product should look like can be vital.
- Clean your pipes before you glue them. A rag dipped in acetone can provide a lot of sanitation here.
In Conclusion
There are few projects that are as incredibly impressive as making a shower drain connection on your own. Plumbing is not easy, and it’s important to remember that each project will be a little different.
The important thing to remember here is that you are going to have to connect the drain to the Y-connector that will be glued to your waste pipe. This can require one fitting and a P-trap, or it can require a lot more. It can vary based on the space you have.
Your goal is to provide as clean and quick a flow from the drain to the waste pipe as possible, all while you keep a P-trap in the path.