Are you a DIYer who wants to know how to install Sharkbite fittings on the copper pipe? Then you’ve come to the right page.
Sharkbite push-to-connect fittings are great choices for they help you connect similar/different pipes seamlessly. And while they may seem daunting to use, it’s not the case.
Here I’ll explain how to install these fittings, including the materials you need to do it. Let’s get started!
Tools Needed
- Rag
- Fine sandpaper (180 grit)
- Permanent marker
- Tape measure
- Deburr and gauge tool or rotary tube cutter
- Silicone tape (for underground applications only)
- Disconnect the clip or tong (for uninstalling fittings)
How to Install Sharkbite Fittings on Copper Pipe
According to this Sharkbite video, you can install the fittings on your own simply by following these simple steps:
Step 1. Identify the Pipe Type
I know that we’re talking about copper pipes here, but let me explain.
This first stage – determining the pipe type – is essential because of possible compatibility issues. Granted that Sharkbite may be used in PEX, CPVC, HDPE, and copper pipes, some nuances go with every type of pipe.
For example, the manufacturer offers a pre-loaded PEX stiffener to be used in both PEX and HDPE pipes.
If you plan on using this connection system on a copper pipe (as is the case here), know that there’s no need to unload this stiffener. Doing so will only damage the grab ring.
Pro tip: While Sharkbite is can be used on copper pipes, it may not work as well on softer versions. They can deform easily, which means it may prevent the fitting from sealing the connection completely.
Step 2. Pick the Right Fitting Size
Choosing the correct size of pipe and fitting is crucial. Fortunately, Sharkbite offers fitting sizes ranging from 1/4 inch to 2 inches.
Remember: you wouldn’t be able to install the fitting accurately if the connections are off!
Step 3. Clean and Cut the Pipe
For the Sharkbite fitting to work properly, you will need to clean the debris with a wet cloth.
If there is old solder on your copper pipes, then use fine sandpaper (180 grit) to remove them. Fight the urge to shine them (as you would do with soldering). Doing so may lead to scratches that could cause leaks in the connection.
Simply put, foreign objects and scratches can lead to connection failures because they stop the Sharkbite fitting from affixing well.
If you do spot debris in your fitting, you will need to remove it too. All you need to do is rinse the fitting under running water. It’s that easy!
As with cleaning the parts, it’s also important to cut the pipe squarely with a rotary tube cutter. Don’t use a hacksaw to make a cut end for it will not be as smooth as it needs to be.
I also recommend using the deburr and gauge tool for cutting the pipe. This can help eliminate the burrs and sharp edges around the ends. Again, this is important for the burrs may end up damaging the O-ring.
As you make a cut, remember to leave an inch of space in case you want to remove the fitting.
Pro tip: Sharkbite fittings may be used behind the wall or underground. If you’re going for the latter, make sure to apply silicone tape around the fitting. This will create an airtight/watertight seal that will keep the underground fittings safe from contaminants.
And, once you do bury your fitting, make sure to cover the connection with material that is free from rocks, debris, etc. You don’t want these to damage your newly-placed Sharkbite fittings!
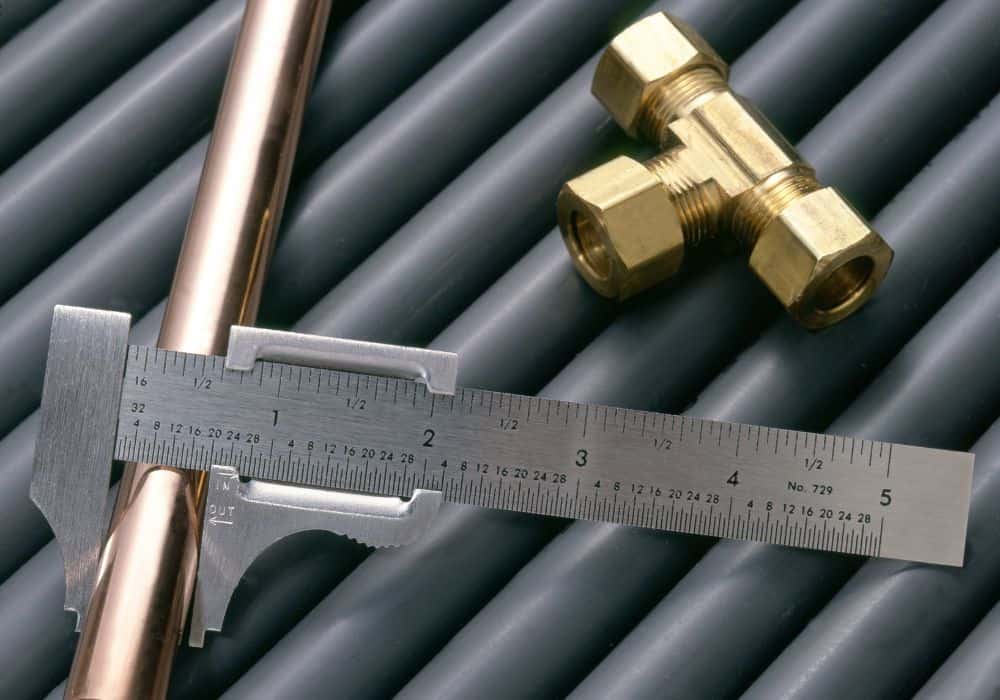
Step 4. Measure and Mark
Use the same deburr and gauge tool to determine the insertion depth on the copper pipe. Label the location with a permanent marker. That way, you will know if you’ve pushed the pipe all the way to the recommended depth.
Pro tip: If you don’t have the above-mentioned tool, you can use a tape measure and refer to this pipe insertion depth chart from Sharkbite.
Step 5. Connect
Insert the pipe through the release collar to prevent an accidental release. This action enables the pipe to rest on the grab ring, which is the part that is meant to strengthen the connection.
Push the pipe with a slight twisting action (not at an angle) up until it arrives at the tube stop.
When using brass adapters, remember to install the threaded end before the push-to-connect end. That way, you won’t exert a pulling force as you tighten the fitting.
Pro tip: It’s important to align your pipes. If not, the side with no tension will not seal properly. And if you do decide to ‘kick’ the pipe to align it, you’ll just end up damaging the fitting.
Likewise, make sure that your pipes are adequately supported. That way, you don’t create a leak-causing side load.
Step 6. Check
If you want to be 100% sure that the pipe is correctly installed, see to it that the depth mark is within 0.13 mm or 0.005 inches of the release collar end.
Another way to see if you’ve installed the fitting correctly is to turn on your water line. This will help you check the fitted area for leaks. And, if there are any, you may need to repeat the entire process.
Of course, you may omit this step if you’ve installed the fitting onto a ‘wet’ pipe (and there are no leaks as you do so.)
Pro tip: Sharkbite fittings are not electronically continuous. To ensure proper grounding, remember to affix a copper jumper cable to your connection.
Additional tip: Make sure to winterize your pipes, especially if you’re living in a cold area!
How to Uninstall a Sharkbite Fitting
One of the great things about a Sharkbite fitting is that it’s removable and reusable. So if you want to uninstall this material and transfer it to another copper pipe, then you have two ways to do so.
With a Disconnect Clip
- Snap the clip onto the copper pipe.
- Pull the release collar upwards.
- Pull the pipe to remove the fitting.
With Disconnect Tongs
- Place the tongs on the pipe and Sharkbite fitting. The fork end (with the brand logo) should be around the pipe, while the other end should be situated at the fitting neck.
- Press on the tongs to activate the release collar. If you don’t do this, then the teeth will just go deeper into the pipe.
- Pull the pipe with a twisting action to remove the fitting.
Pointers to Keep in Mind:
- If you’re planning to re-attach the Sharkbite fitting onto this area, then make sure that the outside diameter is still in good condition. If there are notable defects around the pipe, then you will need to cut this area before reconnecting it.
- It’s only good to reuse the Sharkbite fitting a maximum of 5-6 times. Using it for longer will lead to the loss of lubrication and eventual damage to the O-ring.
- According to professional plumbers, you can also try to lubricate your Sharkbite O-ring with silicone grease (and make it last longer.) Don’t use petroleum jelly for it will damage the O-ring rubber!
FAQs
How Do Sharkbite Fittings Work?
Sharkbite push-to-connect technology works in two stages:
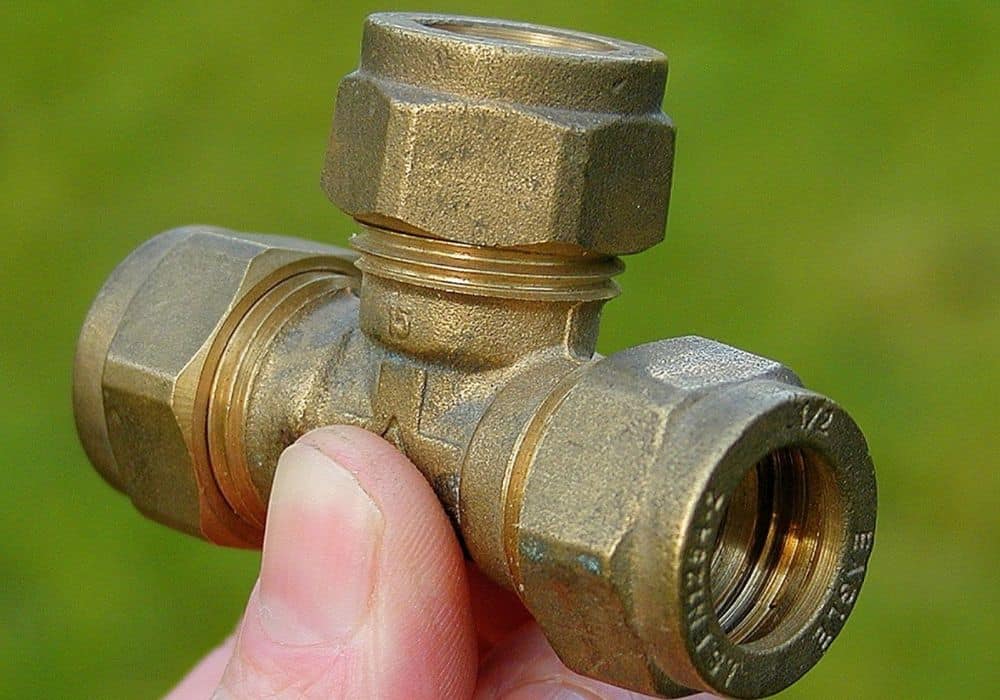
- The pipe, when inserted, passes through 2 parts: the release collar and the stainless steel grab ring. The latter is lined with teeth that open and ‘grab’ onto the pipe.
- The pipe is pushed and aligned by the O-ring protector. The O-ring is then compressed between the pipe and the fitting wall. As the pipe end arrives at the tube stop, the connection is secured.
Why Use Sharkbite Fittings?
Sharkbite is perfect for copper pipes – as well as other pipe types – because of these advantages:
- May be installed in wet lines. Although it’s recommended that you turn off the water source before installing this fitting, you may go ahead and do so under full flow.
- Sharkbite fittings are made from lead-free brass. This makes this product durable, strong, and corrosion-resistant. It can also withstand temperatures of up to 200 degrees Fahrenheit and pressures of up to 200 psi (for copper tubings.)
- You can change the fitting’s orientation even after installing it.
- Requires little to no tools. You don’t need special equipment to place the fitting!
- You can easily uninstall your Sharkbite connectors and use them in another project.
- Long warranty. The Sharkbite Company offers a warranty of 25 years.
Conclusion
To install Sharkbite fittings on a copper pipe, you should:
- Identify the pipe type
- Pick the right pipe/fitting sizes
- Clean and cut the pipe
- Measure and mark the insertion depth
- Connect the fitting to the pipe
- Check the fitting connection
In case you want to remove these fittings, you may do so with the use of a disconnection clip or tong.
Installing Sharkbite fittings is easy, right? If you’re still confused, worry not for I’ll answer any question you have below.