A ceiling fan doesn’t need to do much to keep you happy, but a flickering light quickly sours any environment. It seems to always happen at the worst time and rarely resolves itself.
There are several reasons that a ceiling fan light may flicker, ranging from old light bulbs to more serious wiring problems. Because each issue merits a different response, it’s important to diagnose your flickering light before trying to fix it.
Keep reading as we explain the most common reasons your ceiling fan light flickers and what you can do to solve the issue.
Why Your Ceiling Fan Light Flickers
There are a few reasons a ceiling fan light flickers, and each one requires a different solution. The most common issues include:
- Old or outdated light bulbs
- Dimmable light switch incompatibility
- Loose light bulb connections
- Old light switches
- Old ceiling fans
- A bad current limiter
- Overloaded circuits
- Loose wiring
Before you start planning a whole renovation, make sure you pin down the actual root of your problem.
1. Old or Outdated Light Bulbs
Unfortunately, not all light bulbs work the same. Some types work better than others, while size and special features also affect your light bulbs’ compatibility.
Replace any old lights, especially incandescent varieties, before you make any judgments about your ceiling fan. These bulbs, identifiable by the metallic filament in the bulb, perform poorly and eat up more electricity than fluorescent or LED bulbs.
Fluorescent bulbs are more likely to flicker than LED light bulbs, and they may be the culprit behind your flickering ceiling fan lights. These bulbs have a standardized number on their neck that starts with an “F” for easy identification.
LEDs offer the most reliable lighting, but they run into issues with ceiling fans with dimmable light switches.
2. Dimmable Light Switch Incompatibility
If your ceiling fan has a dimmer switch, make sure it is compatible with your light bulbs. Most dimmer switches older than 5 years will not work with LED light bulbs, and they operate in a higher wattage range.
It’s worth it to upgrade to a trailing edge dimmer. This runs about $60 to $120, but it makes your ceiling light safer and more reliable for future use.
3. Loose Light Bulb Connection
Light bulbs that are not properly seated in the light socket will further loosen over time, especially if you use your ceiling fan. This leads to an incomplete connection, and your lights will flicker as they make and lose contact.
Feel your light bulbs while they are off to determine whether they sit all the way in the socket. They should not wiggle without moving the fan.
Tighten any bulbs that move suspiciously, then turn your fan back on to see if the issue persists.
4. Old Light Switches
Once you determine that your light bulbs are not the issue, it’s time to consider your light switch.
Flickering is more common with dimmer switches, especially those in older homes, but loose or old wiring on any switch may cause the lights to flicker.
To check your light switch without taking everything apart, quiet the room. Turn the light switch on and listen for any noises behind the switch. Faulty wiring usually causes buzzing, sizzling, or popping sounds when electricity runs through them.
Cut off power to the light switch until you can repair the wiring and/or replace the switch.
5. Old Ceiling Fans
Old ceiling fan fixtures are another likely cause of light flickering, and they pose additional threats to your sanity and safety. Some ceiling fans are obviously dated, but more subtle signs of an old ceiling fan include:
- A ceiling fan that wobbles (even slightly)
- Noisy ceiling fans
- Poor cooling performance
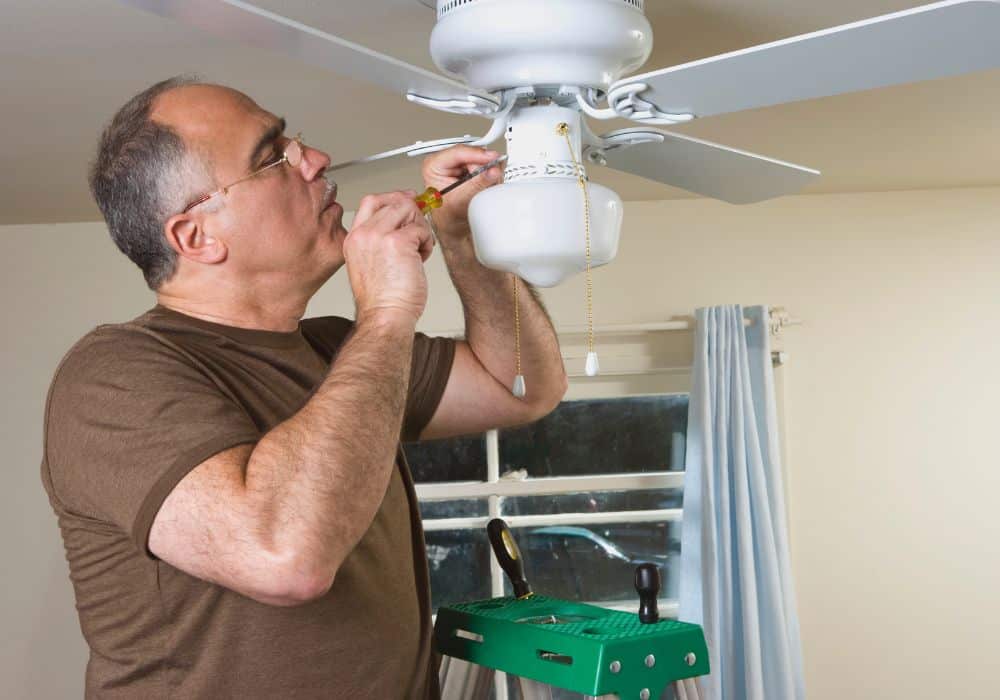
Those with wiring experience can change the ceiling fan on their own. If you’re unsure, it’s better to trust the job to a licensed electrician. They ensure proper wiring of the new fixture and have a better understanding of current electrical standards in your area.
6. Bad Current Limiter
A current limiter (also known as a wattage limiter) reduces the energy usage of your ceiling fan, but it can cause problems like light flickering when it starts to go out.
The current limiter is what imposes the maximum wattage on your ceiling fan, and it’s designed to shut your lights off if they draw over that number. When it starts to act up, the part may shut your lights off or cause flickering with no warning.
It’s best to have an electrician verify that the current limiter is your culprit. They will open up your ceiling fan wiring box and use a voltage tester to determine whether this part has gone out or is acting erratically.
Your electrician will also help you determine whether you need to replace a faulty current limiter or if your ceiling fan can operate safely without it.
Theoretically, ceiling fans manufactured after 2009 cannot work bulbs adding up to more than 190 watts anyway, so you shouldn’t need to replace the part.
7. Overloaded Circuits
Pay attention to your ceiling fan lights when something else uses electricity in your home, such as your refrigerator kicking on. If the lights flicker or dim when something else draws current, you’re dealing with overloaded circuits.
This means that there is not enough electricity to handle everything you have running at the same time. If it happens specifically when your larger appliances run, then your ceiling fan lights are improperly wired on the same circuit.
This shouldn’t happen in newer construction, but older homes or those with questionable renovations are likely to have this issue.
You need to lighten the load on the circuit to prevent a future disaster and prevent flickering. Replacing your bulbs with LEDs is a quick and easy fix to reduce the power draw from your ceiling fan lights.
8. Loose Wiring
If your flickering ceiling fan lights are not due to any other issue on this list, it’s time to look at the wiring in your home. This happens more often with older homes, and it’s the likely reason if you experience other electrical issues in your home.
Loose wiring in the home is not a simple fix, and it requires professional attention for a thorough resolution. If it is not resolved, loose wiring can lead to electrical fires, the third leading cause of home structure fires internationally.
Have an electrician repair or replace any suspect wiring and perform an in-depth analysis of your home. Not only will this fix your flickering ceiling fan issue, but it might save your life.
DIY Repairs for a Ceiling Fan Light that Flickers
Once you determine the reason your ceiling fan light flickers, you may consider making the repairs on your own.
Do not attempt electrical work on your home without previous experience or professional monitoring. Follow basic safety precautions when working with electricity, including:
- Turning off the power at the main circuit
- Verifying power is off using a voltage tester
- Avoiding water
- Using only compatible replacements
While it’s nice to save some money on a contractor, electrical repairs and changes are not the right place to be frugal. There’s no shame in bringing in an electrical to fix your flickering ceiling light.
1. Replacing Your Ceiling Fan Switch
Before you replace your ceiling fan wall switch, make sure your replacement is compatible with your ceiling fan model. If you’re replacing the switch with a dimmable model, we recommend one suited for LED lights.
Turn off the power at the circuit breaker, then remove the wall plate for the switch. Test the switch power to verify that it is inactive.
Loosen the mounting screws at the top and bottom of the old switch and then remove the box. This should give you enough room to remove the bare wire from the grounding screw before detaching the other connections.
Strip about ½ inch of insulation from each of the wires on the new light switch and their connection, then attach the bare wires with the appropriate screws before tightening.
At this point, you should be able to mount the junction box back to the wall. Test the ceiling fan and lights, then replace the light cover.
2. Replacing Your Ceiling Fan Fixture
If you opt to replace your entire ceiling fan and light fixture, make sure you find the appropriate fan size for your room and follow its specific mounting instructions. This varies depending on the style, but we’ll run through it quickly here.
- Turn off your breaker, then use your voltage tester to verify there is no electricity to your fan.
- Remove any lights in the fan, then remove the old fan from your ceiling. You should have somewhere high up to rest it or someone to hold it while you deal with the electrical connections.
- Attach your mounting bracket to the electrical box in your ceiling, then assemble your new fan using the included instructions.
- Strip ½ inch of insulation, then have someone hold the fan while you make your new connections following the manufacturer’s diagram. Push the wires back into the box and secure the fan in place.
- Attach and install your blades, then assemble your light housing kit. Connect the ceiling fan plugs to your light kit and attach it to the fan. If everything goes to plan, your fan should be ready to go.
Conclusion
Having a ceiling light that flickers is inconvenient and annoying, but it’s usually an easy fix. Run through solutions such as:
- Updating or switching your light bulbs
- Tightening your light bulbs
- Replacing your light switch at the wall
- Replacing your ceiling
- Removing or replacing your current limited
- Reducing your circuit load
Comment any questions you have with your ceiling fan light that flickers, and we’ll help you diagnose the issue so you can find the right solution!