
Are you trying to move, replace, or inspect your gas stove? Are you worried about doing it safely and keeping the gas where it belongs?
Disconnecting a gas stove improperly could cause a gas leak, fire, or even an explosion. According to the U.S. Department of Transportation, there were 89 deaths and over 440 injuries over the last decade due to natural gas explosions alone. We’re here to help you avoid a potential catastrophe and learn how to disconnect a gas stove safely and efficiently.
This article will cover the tools and step-by-step process you need to properly disconnect your gas stove today, plus our pro tips for extra help along the way.
Tools
Before getting started, you’ll need a few key tools from your local hardware store.
- Two protective boards: optimally 2 pieces of Masonite, 2X4, 1/8” thick each
- An adjustable wrench 10” or greater
- Optional:
- 2 additional Masonite boards if you plan to move the stove out further than 4’ from where it is placed
- A second pipe wrench if you plan to replace or reattach your flex pipe
- Pipe thread sealant if you plan to replace or reattach your flex pipe
Step-by-Step Guide
Follow these 5 direct steps to safely disconnect your gas stove with ease.
1. Place the Masonite Under the Stove Legs
Masonite is engineered wood created from different fibers similar to particleboard, plywood, and medium-density fiberboard. It is a type of high-density fiberboard (HDF) that has been tightly compressed through a wet process making it light, somewhat flexible, and versatile.
Pick up your Masonite board. One side should be smooth and the other felt-like. All homeowners should wipe down the board to avoid scratching their floor and place the felt/rough side on the ground in front of their gas stoves.
Since the boards are usually sold as 2X4s, you’ll need two to cover the width of your stove. Slide the boards under the legs of your stove one at a time, gently lifting the stove with your arms and using your feet to push the boards underneath the front legs of the stove. One board will partially overlap with the other.
For a visual of this process, check out this video.
Pro tip: If you prefer to move the stove out further, get your two additional Masonite boards and face your stove. Now, place the additional boards vertically, with their ends under the ends of the original two boards. This will prevent the boards from sliding out once the stove is in motion. The boards should now form a column that leads to your stove.
2. Move Your Stove Outward
Open your oven door slightly, reaching in the oven and under the stovetop to get a firm grasp on the appliance. Lift the oven and pull it outwards slowly. If you have back issues or are not in good health, have a friend or relative complete this step for you.
The oven should start to move along the Masonite board. You may need to push it up slightly for the back to catch along the board. You will notice scratches along the Masonite boards once your oven passes over them; these scratches would have otherwise wreaked havoc on your kitchen floor.
Pro tip: Don’t try to move the oven by its handle. Too much force could easily bend the handle or ruin the door’s latches completely.
3. Unplug the Range
Once the stove is far enough from the wall, walk behind it and locate the outlet it is plugged into. Unplug the stove.
If you’d like to be extra cautious, disconnect your kitchen’s electricity from your circuit breaker before this step.
Pro tip: Never disconnect a stove’s plug if you think there has been a gas leak because this could initiate a spark that would cause an explosion. If you think you have had a gas leak, leave your home immediately and contact 911. You should also contact your state’s local gas supply number.
4. Shutoff the Gas
Your stove should still be connected to the gas line through a flexible tube that ends near the gas shutoff valve. This tube may be called a flex tube, pipeline, flex hose, flex line, or flexible gas line. The valve is often red or yellow and looks similar to a valve that turns outdoor water hoses on and off.
According to virtually all state codes, gas shutoff valves should be located within 6 feet of your stove gas appliance. Older buildings may have the valve located in the basement ceiling, underneath the floor where your flex tube meets the gas line in the wall.
Once you locate the valve, turn it 90 degrees perpendicularly to shut off the gas. Some valves turn clockwise while others go counterclockwise. Gently try both directions until you can turn the valve the required distance – it should not allow turns past 90 degrees.
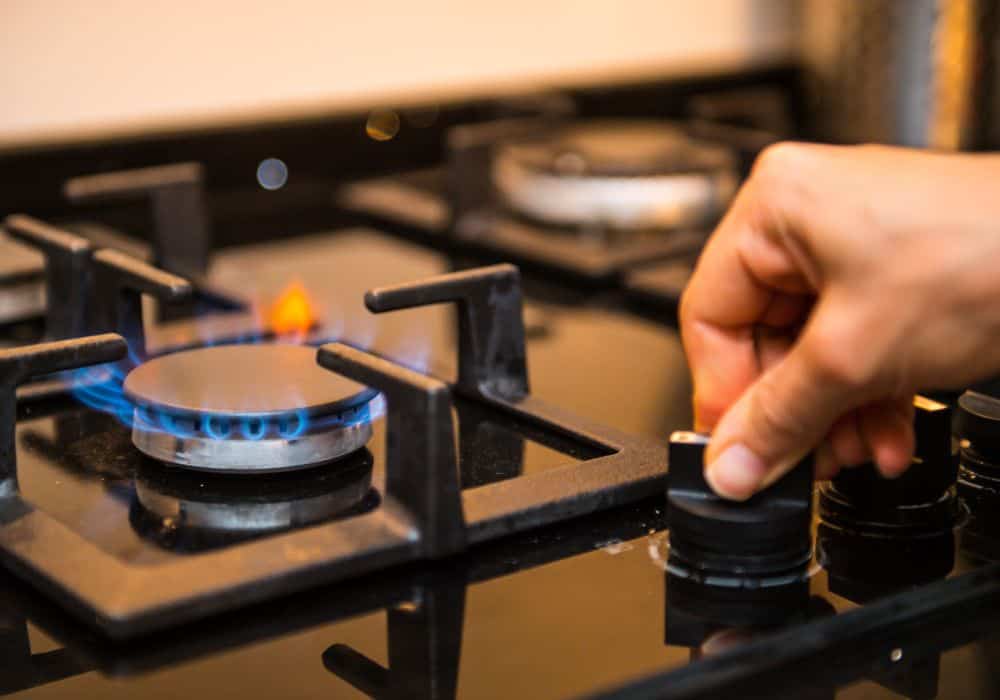
Make sure your gas is off by returning to your stove and attempting to ignite one of your burners. If you hear the clicking noise of your burners but they do not ignite, the gas has been successfully turned off.
Pro tip: Never disconnect a gas line until you have confirmed the gas has been shut off. If you are unsure, ask someone with experience to double-check this for you before continuing.
5. Unscrew the Flex Pipe
Find the place where your stove’s flex pipe connects to the gas pipe supply coming from the wall. This is usually a nut found right under or next to the gas valve.
Place your wrench on or next to the nut to see whether it needs to be adjusted. Move the thumbscrew to adjust the size of the wrench’s jaw so that it fits snugly around the nut.
Place the wrench on the nut with the adjustable jaw facing towards you. Pull the wrench towards you to loosen the nut, return to the same position, and repeat this motion until the nut completely unscrews and the flex pipe is freed from the wall.
It is normal to smell a bit of natural gas when you first disconnect the gas line. This gas was trapped in the gas main line or flex tube and has now been released. Do not light any fires near your kitchen during this time.
Pro tip: If you still smell natural gas after about five minutes, reconnect your gas line and call your gas company or 911 immediately.
Extended Tips

Since you’re disconnecting your stove, take advantage of these extended tips to make the most of your handyman work.
- If changing out your stove, take this opportunity to replace the flex pipe that will connect your new stove to the gas line. Purchase a flex pipe that is long enough to comfortably pull your stove far away from the wall, but not too long that it has to bend multiple times to fit behind the range. Make sure the pipe is rated for your oven (in the correct BTUs).
- If the flex tube is screwed onto the oven or gas supply line too tightly, use a second wrench to help loosen it. Tighten one wrench on the fixed structure and hold it with your non-dominant hand. Then, tighten the second wrench around the nut you want to loosen and pull on it with your dominant hand. Both hands should have a strong grip on their respective wrenches during this process.
- Clean off the tips of all lines and pipes before reattaching or retightening them, especially the threads. The threads are the small crevices around the end of the tube that help it attach to a fixed structure.
- Add sealer to the threads of the flex tube end that attaches to your stove. Wipe off any excess seal after screwing the tube in. Do not attach the sealer to the flex tube end that connects to the gas supply on the wall.
- When turning your gas back on after reattaching all tubes, test it for a gas leak before turning on your appliance. Fill a spray bottle or sponge with soapy water and wet it around all valves and joints, both at the back of the stove and on the gas supply on the wall. If additional bubbles form or you smell an egg-like odor, gas is leaking from your line.
- When returning gas stoves to their original spots, be sure the flex tube is positioned with loose curves and not pressing against the softer parts of the back of the stove.
- If your shutoff valve is blocked by a cabinet or other unmovable structure, reach out to a professional to fix this problem before disconnecting your gas stove. The shutoff valve should always be accessible if you want your house to be safe and up to code.
- Some shutoff valves will be too tight to unscrew with your wrench, in which case you can use pliers to try and jolt it free.
Conclusion
Now that you’ve gone through our guide, you’re ready to disconnect your gas stove safely and securely.
Remember to:
- Place Masonite boards under the front legs of your stove to avoid scraping and ruining your kitchen floors
- Pull your stove out by pulling on the upper-inside area of the oven
- Walk behind the stove and unplug the range
- Find the gas shutoff valve and turn it so that the gas supply is off
- Unscrew the flex pipe from the gas supply line
If you’re left with any questions, feel free to comment below so that we can get back to you. Otherwise, congratulations on learning how to handle your gas stove, and best of luck with your other handyman projects!