It is common to experience pipe leaks in your home, and when this happens, it is either you call a pro or do it on your own.
If you want to go for the latter, there are some steps that you should follow, especially when the leak is covered by a wall tile.
In this article, we will discuss how to find the leaking part of your pipe in the wall, how to repair it, and how to prevent this leakage from happening again.
What Caused My Wall Pipe to Break?
Sometimes, you would ask yourself, how did the leaking happen when it is covered by my wall?
Well, the answer is the most common reason for burst pipes is extremely cold weather. The water inside of them enlarges and approaches freezing as a result.
When the pressure builds up too high, the pipe’s structure is harmed. When the temperature drops to -6 degrees C, this typically occurs.
Aside from temperature, other causes of wall pipe breakage are rust and corrosion.

Signs of Pipe Burst in Wall
Moreover, aside from observing small amounts of water in your wall, there are other signs of pipe bursts as well. Some of these are the following:
- The most obvious indication that you have a flood is when you observe water puddles on the floor, very wet walls, and a water meter spinning erratically.
- If you do not have a tiled wall, you may observe bubbles appearing under the paint or wallpaper on your walls when the water leaking is not immediately apparent.
- An additional indicator of excess wetness. Even while some homes already have this issue, a damaged pipe could be to blame if you’re just now becoming aware of it.
- Your lawn would be flooded with water if a pipe outside your house and in your yard burst. Additionally, if there are areas of lush green grass, a broken pipe is most likely to blame.
- Discoloration of walls, stains, peeling paint, or wallpaper damage.
- Dripping sounds of water and a moldable touch of walls.
If any of these signs are observed, you might want to do the repair or call a professional plumber as soon as possible, or else, a spiking monthly water bill is what you will get!
Locating the Broken Pipe
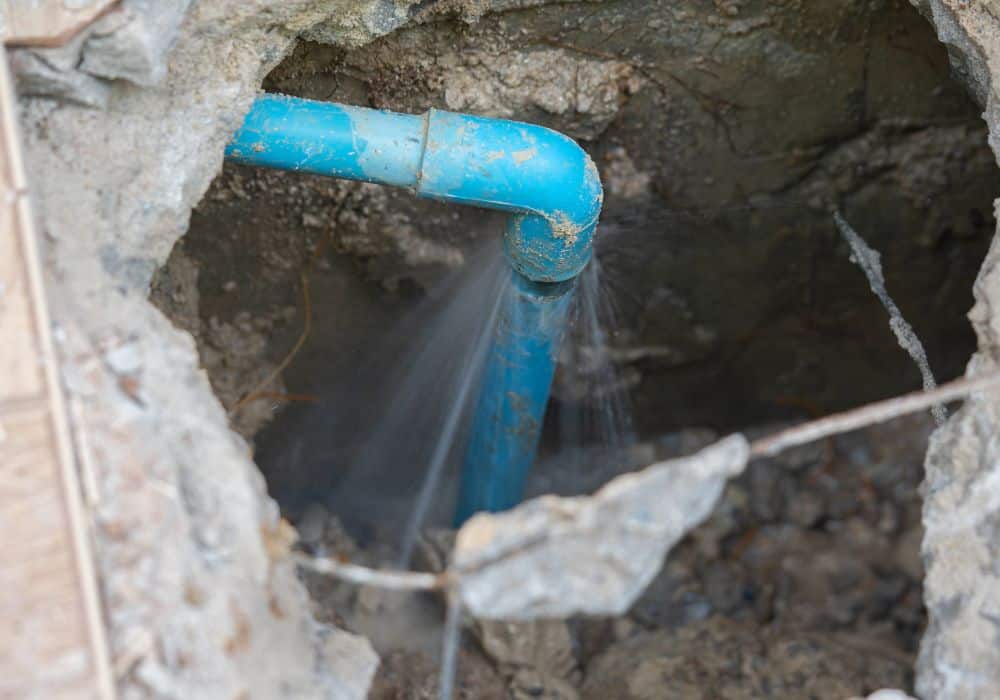
The first step in fixing a pipe leak, is, of course, locating the broken pipe. It does not mean that when you see a wet part in your wall, that area has a broken pipe.
Thus, you should know how to properly locate the broken pipe in order to save time, effort, and money as well.
1. Look for indications of water damage
If you get this high monthly bill and you do not know what part of your home has the leaking pipe, you have to look for indications of water damage. Look throughout your basement, floor, walls, and ceiling before stopping where the damage is most obvious.
Though it is not necessary, your leak is most likely there. Water frequently collects in different locations.
2. look for corrosion and mold
Then, look for corrosion and mold in exposed basement pipes. Take note that leak repair is required nearby if there are signs of corrosion, dampness, mold, or rotten wood. Most likely, behind the wall is where the broken pipe is.
3. Sewage odor
If you still cannot find the leak visible, consider the sewage odor. In any case, you really don’t need to apply for this one.
But, having a damaged pipe that is also a sewer pipe is indicated by the presence of sewage odor or musty smell. Things can become quite dirty with this one as well.
For this part, it is recommended that you should contact a specialist right once because they have specialized tools for handling situations like these.
Furthermore, the poisonous gas emitted by the sewer lines is extremely explosive.
4. Use a moisture meter
You can also consider using a moisture meter. If you do not have one, you may rent or buy one from a local hardware store. Professional plumbers typically carry one of these with them.
To use it, find the location where the instrument reads the highest on your walls and point it there. It is the area that is closest to the leak.
5. Use an infrared camera
Lastly, an infrared camera may also work. Although it cannot “see” water or moisture in your walls, it can identify coldness.
The camera will detect the temperature drop caused by a leaking water line. As a heat source, hot water pipes appear.
Fixing a Broken Pipe Behind Your Walls
After finding the broken pipe, and you found that it is located behind your wall, below are the proper steps for fixing this damaged pipe:
1. Cut out some part of the wall
I know you do not want to do this drywall cutting, but, if you want to fix the pipe, you might want to cut some part of your wall, where the damaged pipe is located.
This will allow you to have access to the pipe, and if essential, this will also allow you to remove the pipe completely.
2. Get a paper sheet and wrap the pipe
Sometimes, you don’t really get to see the leakage in your pipe. What you will only get is running water.
So, if you did not get the luck to find the exact broken part of the pipe, you might want to get a sheet and wrap the pipe.
Aside from paper, you can also go for cloth. If you do not still find it, you can do this a couple of times to get the exact location.
3. Get a container that will collect the water spill
Under the broken pipe, put a container to collect the possible spill. Doing this mini technique will reduce the messiness of the plumbing repair.
This is not essential, but if you do not want to do a lot of cleaning after, considering it is highly recommended.
4. Cut the pipe
When cutting the pipe, you do not cut the whole pipe. Instead, there is this specific part that you should work on, and that is the part below the water leak.
For this part, a pipe cutter tool is required. Till the pipe is cut through, tighten the tool’s screw and revolve.
5. Use a paper towel to dry the pipe

Of course, you cannot work on a wet, damaged pipe. What you should do first is to dry it using a paper towel.
6. Cut the pipe, again
When the pipe is dried already, you should cut the pipe again. But this time, you should be cutting the part above the leaking pipe.
7. Clean and sterilize the pipe
After cutting, you should start cleaning the pipe. This cleaning encompasses both the inside and outside. Make sure it is free of any impediments because the interior may contain more ice.
8. Solder the copper pipe
After all the cleaning, you should heat up the repair sleeve’s bottom end with a blowtorch. Give the solder a time to melt and fill the junction.
Do the same for the upper end when it has cooled in about 10 to 15 minutes. When doing this, put on your safety glasses and gloves. When you’re finished, look for leaks in your repaired pipe.
Looking for leakage is essential, especially in the soldered part. Sometimes, there are still little holes that can continue causing water leakage.
9. Repair your wall
If your wall is plain and is just covered by cement, patching it is simple. However, if your wall is tiled, you might want to properly remove the tile in the first place to avoid breaking the tile.
Pipe Replacement
The steps above are only for minor repairs. As you have seen, they entail slicing into your drywall to locate the leak’s source and then fixing the affected areas.
Alternatively, if the leak is isolated, the plumber may apply a quick patch and move on.
However, if there is a need, total pipe replacement should also be done, especially if your pipe is decades old, or when this pipe is connected to your showers, washing machine, sink, and dishwasher.
Take note that professional plumbers can determine If your pipe is old or has the potential for future leaks.
If you think that you need to replace them, seeking help from these professionals will surely save you a lot of money in the future.
Pipe Breakage Prevention
After repairing, of course, you do not want this damage to be done again. What you should do next is to prevent this from happening.
To ward off expensive and time-consuming repair, some of the prevention techniques are the following:
- Insulate your pipes
- Consider heating devices during the winter season
- Monitor your room temperature and heat the part manually
It is also advisable to take note of clogged gutters and downspouts. Usually, when these are present, they will put pressure which will eventually cause a crack.
Final Thoughts
Indeed, a broken pipe does not only cause a mess around your house but in your pocket as well.
If you want to do the repair on your own, you should follow the right steps to avoid damaging the whole pipe. For better and secured repair, seeking help from a plumber is highly recommended.
Sometimes, pipe repair is not what you need but pipe replacement.