
Do you want to know the process of how to install a sewer drain pipe? Stay on this page and learn more about the key procedures as well as the ins and outs of sewer pipelines. All the information below gives you a solid grasp of the instructions and other relevant details that you need to comprehend beforehand.
What is a sewer drain pipe?
Before we get started, it’s pivotal that you are able to identify sewer lines from other kinds of pipes. A sewer drain is a system of pipes that transports sewage from different sections in your home, including wastewater, excrement, and other dirty substances, to a water treatment facility in your area.
Before being transported to its end destination, the waste and wastewater go through a large neighborhood pipe. From there, the large bulk of dirty elements is conveyed to a treatment facility to be filtered and cleaned.
Because of the nature of its process, sewage drain pipes are generally stationed underground. The location also helps in minimizing possible contamination of water in your household. And in general, sewer drain pipes are managed by the local water authority. At times, it could be administered by private ones.
You might be wondering why is this the responsibility of the local utility company. Well, it’s because sewer drain pipes are different from drainage systems. Drainage is the structure of pipes that runs through your home and to the city sewer, and drainage is the being handled by the homeowner or the property owner.
Why sewerage pipes and drainage are crucial?
In every home, there should be a drain line that ensures all wastewater and dirty elements are flushed out from your household. If this isn’t present in your home, can you picture where would all the sewage be stored in your residence?
Henceforth, as a property owner or perhaps a business owner, you need to facilitate the construction of proper drainage to avoid significant problems in the long run. On the other hand, if you want to know about the installation of a sewer drain pipe, then continue reading below.
What are the steps in installing a sewer drain pipe?
Comprehending the installation process of a sewer pipe is pivotal, especially if you are working for local water firms and companies. To give you an idea, we’ve listed down the pivotal procedures, starting with choosing the right materials.
1. Distinguish the best pipe materials.
You should know that there are various types of pipes, each with specific functions. There are three primary materials used for sewer drains, and we will discuss them one by one.
- Concrete pipes ― this is the most recommended option among experts when it comes to infrastructure that is buried. Concrete pipes are very durable and last for a long time. Another impressive feature of concrete is the fact that is rot-resistant with less maintenance.
Although concrete is considered to be the most suitable choice, this should be handled with care as its physical properties are prone to breakage. In addition, this needs thorough inspections, especially during installation.
- Plastic pipes ― when it comes to a variety of sizes, plastic pipes like PVC take up the top spot. Plus, there are different dimensions and lengths available for easy selection. Just like concrete, plastic pipes are also long-lasting and are ideal for locations that are susceptible to earthquakes.
- Galvanized iron and cast iron pipe ― the durable properties of these two steel piles make it another good recommendation for sewer drains. However, there are certain downsides that you need to consider such as a higher risk of rust and costly features.
2. Start establishing the measurement.
Once you have chosen the most appropriate material, you may now kick off with determining the depth of the pipeline. This step is very crucial as it serves as the foundation of the sewer line. Therefore, you have to establish first the distance of the sewerage system as well as the elevation and length of the pipe.
How far is the main drain of the house from the main sewer line designated by the city or local municipality? How far should the pipe go down from the surface? In doing so, you need to use tools to help you determine the measurement.
One of the most essential tools is a GPS, which allows you to identify the distance from the home’s main drain exit to the tap or the local sewer connection. Aside from GPS, you may also make use of a laser level. There are also traditional surveying tools like theodolite and total station, among others.
3. Determine the slope.
After distinguishing the distance and elevation, you now need to calculate the slope. In order to arrive at the initial slope computation, gather both the pipe’s length and the pipe’s elevation. Below is how the process of determining the total drop in elevation as well as the slope is calculated:
Ending Elevation less Starting Elevation = Total Elevation Drop
Total Elevation Drop divided by Total Pipe Length = Slope
Another important thing you should consider is the laterals’ standard minimum slope. This is typically 2 feet per drop for every 100 feet of run, or simply 2%.
Aside from this, you need to take into account the coder requirements set by the local city. Therefore, if the actual slope is steeper compared to the target, you should follow the variation set by the city.
Likewise, you must figure out the possible risks and consequences that may occur due to inaccurate measurements. If the slope is too steep, it causes the difficult passage of solids, which then leads to waste accumulation and clogs. Thus, steeper angles are only favorable for liquids.
On the other hand, if the slope is too shallow, it could not create enough velocity that is needed for efficient drainage.

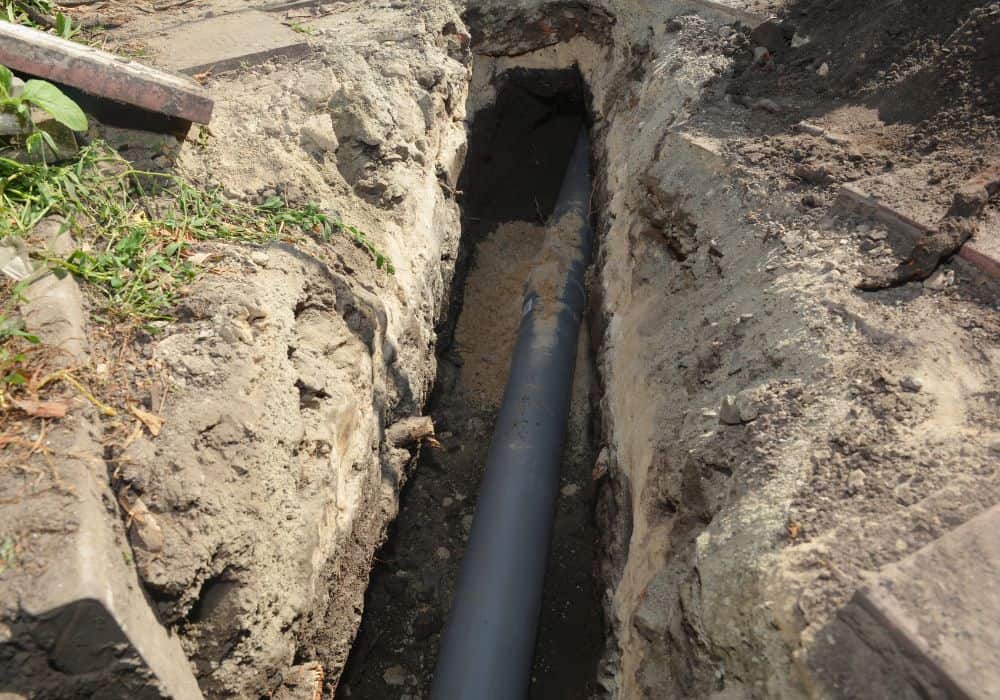
4. Start digging the trench.
The next step would be excavating the surface and digging the trench. This is quite a challenge as you need to consider the characteristics of the ground or the soil. It is too soft or too hard? Either way, when you dig, you have to be careful to ensure that there would be no disturbances in the surroundings.
Try focusing on creating a narrow trench. It’s also suggested that you master first the technicalities of a pipe’s termination point to make this task more effective.
Subsequently, you need to smoothen the bottom of the trench out in preparation for the bedding material. Often than not, sand is used to create a more compact surface while following the desired slope.
5. Lay the pipes thoroughly.
Once the trench is successfully fine-tuned, you may now install the pipe one by one. In doing so, you need to start off with the lower end and then continue with the higher elevation. This specific manner of installation is crucial as it minimizes possible leaks.
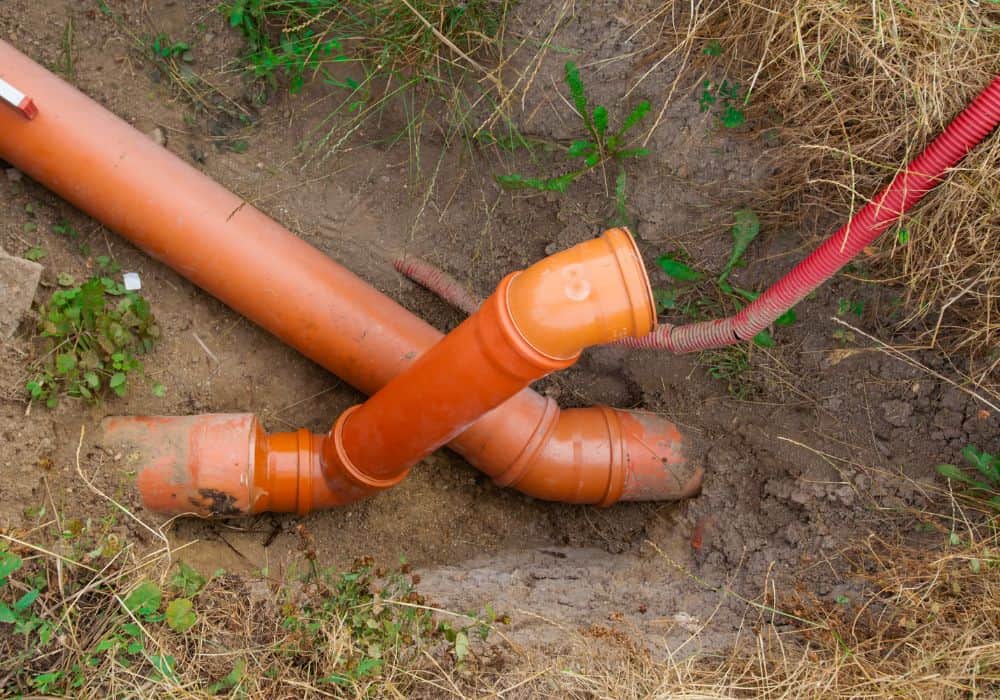
And if you’re using a PVC pipe, then this can easily be connected through solvent glue. Some also make use of gasket filling to join two pipes together. A gasket is highly utilized in these conditions since it securely connects flanges to create a leak-proof sealing.
When laying the pipes, you need to understand that there would be a two-way structure―the one that links to the main city sewer and the other that connects to the house. Do take note that there are certain guidelines between the two lines of pipes.
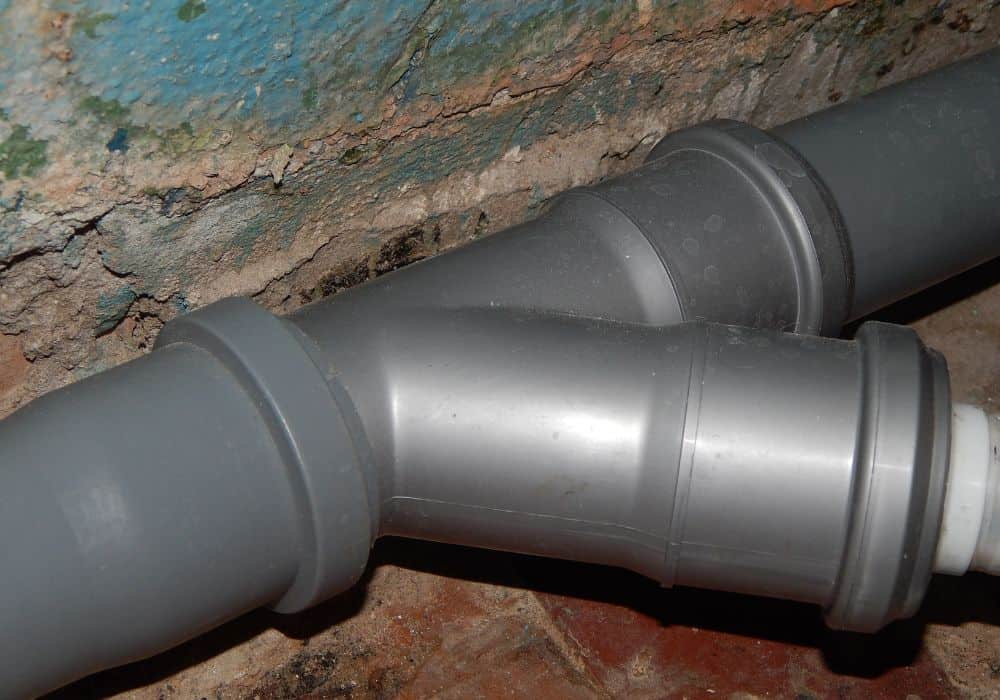
The pipe that connects to the main line follows the regulations set by the local government. Therefore, you should have an idea of the standard pipe size and material in accordance with the local code. On the other hand, the connection of the pipes to the house’s end typically uses standard pipe sizes at 4”.
Aside from that, the line that leads to the house should have at least two cleanouts at your house. These cleanout spots are vital to providing easy access when cleaning the pipes using a sewer auger. This is a key tool designed to remove clogs and sediment accumulation from the drain.
6. Refill the excavated hole.
After laying the pipes and checking if there is no leakage, it’s time to backfill the trench. During this step, you need to start layering the surface with sand. This helps in making sure there are no voids as well as provides protection from unwanted pipe damage.
Afterward, add layers of soil, ensuring that each section is thoroughly compacted. Compacting the soil is imperative as it prevents the settling of the ground. Settling is an unfortunate downward movement of the soil, which could cause problems or even accidents in the future.
And ideally, it’s best to include a warning tape on the first layer of soil. This feature can serve as a warning sign during re-excavation. It provides information to the plumbers and other individuals that the pipe system is installed beneath the soil layer.
Improper backfilling and missing out on any of the core procedures might lead to costly repairs. Therefore, you need to be careful from the very first step up to the last one.
Conclusion
Installing a sewer drain pipe is normally given to expert plumbers. Therefore, it’s highly recommended that you ask for professional help if you want to accomplish this task successfully. But of course, it pays off to have a solid knowledge of sewer drain pipe installation so you can use it in the future.