Lagging pipes is a process of adding insulation to your pipes in order to prevent heat loss and protect them from freezing. This is a great way to save money on your energy bill, as well as extend the life of your pipes.
There are a few different ways that you can lag your pipes, and the best method will depend on the specifics of your situation. In this article, we will go over the different methods of lagging pipes, as well as the pros and cons of each method.
Tools You’ll Need To Lag Pipes
- Pen/Marker/Chalk (To Mark the Cuts)
- Pipe Insulation of Your Choice (Glass Wool Pipe Wrap/Mineral Wool Pipe Wrap/Pipe Wrap Insulation Tape/Elastomeric Foam/Rigid Foam)
- Utility Knife
- Duct Tape/Cable Ties
- Measuring Tape
- Gloves
Step-by-step Guide: How To Lag Pipes
Step1 – Decide Which Insulation Type You’re Going To Use
There are many insulation options you can use to lag your pipes. Each material has its own uses, pros, and cons:
- Glass Wool
It is made of fiberglass and is one of the most popular types of pipe insulation. It is easy to install, and it has a high R-value, which means it is very effective at preventing heat loss.
- Mineral wool
It is made of rock wool or slag wool, and it is also a popular type of pipe insulation. It is slightly more expensive than glass wool pipe wrap, but it is also more effective at preventing heat loss.
Pipe wrap insulation tape- is made of foam or fiberglass, and it is used to insulate pipes that are difficult to access. It is easy to install, but it has a lower R-value than other types of pipe insulation.
- Elastomeric Foam
It is made of rubber, and it is used to insulate pipes that are exposed to the elements. It is more expensive than other types of pipe insulation, but it is also more durable and has a higher R-value. They can either come in wraps or in a pipe-sleeve shape.
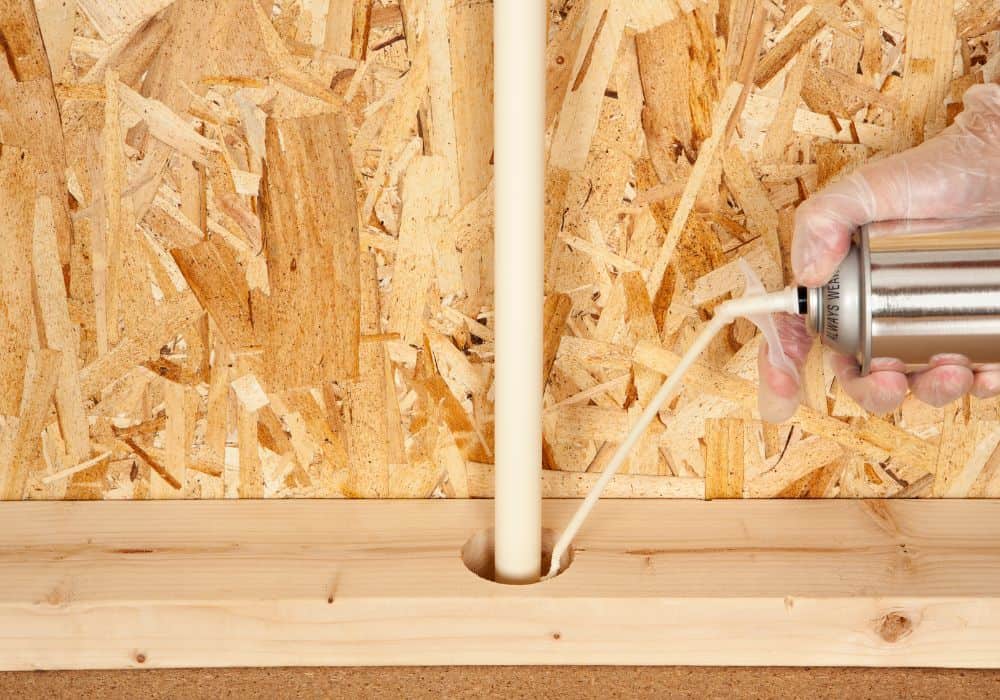
- Polyurethane Foam
This type of pipe insulator can come either in sleeve or spray form. If it’s the latter, you simply have to spray it all around your pipes for insulation. Polyurethane is a great option for homeowners living in climates that go through both, extremely cold, and extremely hot seasons.
Step2 – Measure the Circumference of Your Pipe
To guarantee that the insulation will fit your pipe perfectly, you have to measure the pipes. Use a measuring tape to measure the pipe diameter. To do so, wrap the measuring tape around the pipe and make a note of the pipe’s circumference.
Then, divide that number by π(≈3.14159), and the result is the outside diameter of your pipe. Now, repeat this procedure for all pipes in your home.
Step3 – Cut the Insulation to Size
Make sure to allow for a little extra insulation, as you can always trim it down if needed. Cut the insulation to size using a utility knife. If you’re using elastomeric foam or rigid foam, you may need to use a saw to cut the insulation to size.
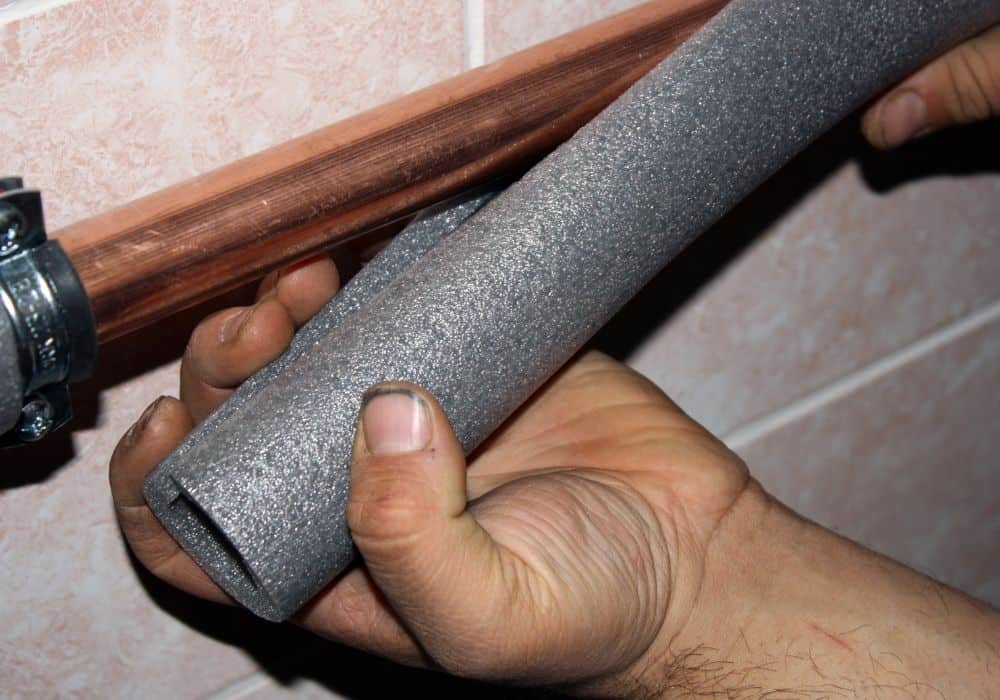
Step4 – Lag the Pipe
If you’re using insulation wrap or tape, then you have to wrap the insulation around the pipe, making sure to overlap the edges. Secure the insulation in place with electrical tape or wire ties.
If you’re using an elastomeric foam sleeve or another type of foam pipe sleeve, you may need to use adhesive to secure the insulation in place.
Step5 – Join the Insulation Sections
When you’re lagging long stretches of pipe, you’ll have to use multiple separate lengths of insulation material. As a result, you have to join the ends together, so it’s fully insulated.
The easiest way to do so is to simply wrap electrical tape around the area where separate
sections of the insulation meet. You can also use a pipe insulation coupling to join the insulation sections together.
It’s a more expensive and time-consuming solution but guarantees the best possible insulation for your pipes.
Step6 – Cut the Fitting to Adjust For Pipe Bends (Optional)
Chances are, the plumbing system in your home takes many bends and turns, to change the direction of the pipe. If the bend is slight, cut out a notch on the interior part of the insulation, so it can be put on the bent part of the pipe.
For maximum insulation, you can re-attach the insulation notch on the exposed part of the pipe with some electrical tape.
If the bend is sharp, you’ll have to cut the insulation sleeve along its length, so it can be put on the pipe. You can use a sharp knife or a saw to make the cut. Secure the maximum insulation by applying electrical tape along the cut on the sleeve after you’ve put it on the pipe.
Step7 – Make a 90-degree Turn (Optional)
If you come across a 90-degree angle at your pipes, cut the ends of the pipe insulation at a 45°-angle, so they can accommodate the turn. You have to cut one end of each section of the pipe insulation which will meet at the turn.
Here’s a quick video showing how to cut the insulation for angled pipes.
Step8 – T-Junction (Optional)
It’s also almost guaranteed that you’re going to encounter at least one T-junction while lagging your pipes. Because pipe insulation is straight, you’ll have to makeshift a T-shaped section yourself.
Don’t worry, it’s much easier to accomplish than it might seem at first. What you have to do is to cut out a 90° notch from the middle of the T-junction insulation section, and then cut off 45° pieces from the end of the insulation which joins the top of the T-junction.
Step9 – Pipe Clip in The Way (Optional)
If your pipes are supported with clips, you’ll have to cut out a piece of insulation so it can fit around it. You can measure the dimensions of the clip and cut out the required area off the insulation, so it can get around the pipe clip.
Why You Have To Lag Your Pipes
Lagging your pipes has many benefits, the most important of which is preventing your pipes from freezing. Water expands when it freezes, and if your pipes are full of water when they freeze, they can burst and cause serious damage to your home.
Insulating can also reduce the noise that your pipes make. Water flowing through uninsulated pipes can be quite noisy, but insulating your pipes will help to muffle the sound.
It can also prevent moisture condensation from forming on your pipes. When water vapor comes into contact with cold surfaces, it condenses and forms water droplets. Lagging also prevents pipe sweating, which is a result of high humidity levels.
Both condensation and sweating are essentially the same and can lead to the formation of mold and mildew, and it can also cause your pipes to rust.
Lagging your pipes is also a great way to save money on your energy bill. By keeping the heat in, your water-heating costs will be reduced. This is because you won’t have to heat the water as much to maintain the desired temperature.
Extended Tips
- You can lag every pipe in the plumbing system of your home, but all hot water pipes from the boiler to radiators (central heating pipes) are in the most need of insulation.
- Then, you can lag pipes in the airing cupboard, those behind bath panels, and below sinks and other appliances, including dishwasher, washing machine,
- If you live in an area that is prone to freezing temperatures, it is a good idea to lag your cold-water pipes before the cold weather hits. This will prevent you from having to fix burst pipes, because the water in the pipes can freeze, causing them to burst.
- If you have any pipes that are located outside, be sure to insulate them as well. This includes any pipes that run through an unheated garage or shed. These pipes are more likely to freeze than those that are located inside your home.
- It is also a good idea to check your insulation regularly to make sure that it is still in good condition. Over time, insulation can become compressed or damaged, which can reduce its effectiveness. If you notice any damaged or missing insulation, be sure to replace it as soon as possible.
Conclusion
Lagging your pipes is a great way to prevent heat loss and protect them from freezing. This is a great way to save money on your energy bill, as well as extend the life of your pipes. There are a few different materials that you can use to lag your pipes, either in sleeve or wrap form.
To lag your pipes, you have to:
- Measure the diameter of the pipes by measuring the circumference and dividing it by π(≈3.14159)
- Cut the appropriate lengths of the insulation
- Lag the pipes by either putting on the sleeves or wrapping around the insulation tape
If you have any other questions regarding this topic, let us know in the comments!