
Do you want to remove your showerhead but it’s stuck?
Most times, you don’t need to call a plumber to remove a showerhead. You can simply unscrew it from the shower pipe within minutes.
However, calcification, rust, or mineral buildup can make showerhead removal challenging.
But, don’t worry, all is not lost!
Here’s a comprehensive guide on how to remove a stuck showerhead, plus how to clean and reattach/replace it so it won’t become stuck again.
How to Remove a Stuck Showerhead?
Before removing a showerhead, you might need a few tools, including pliers or an adjustable wrench and plumber’s tape (Teflon tape). If the old showerhead is faulty, you will also need a new showerhead. Once you gathered these tools, follow the steps below:
Step 1: Inspect Your Showerhead
A well-maintained showerhead will not give you any issues when unscrewing it. But if you’ve tried removing the showerhead, and it’s stubborn, look for clues of calcium buildup or rust.
Calcium buildup will appear as a whitish ring covering the area where the showerhead connects with the shower arm. If you observe an orange or copper ring at the same connection, it’s probably rust.
But what if you observe no rust or mineral deposits? Chances are, the showerhead is secured tightly or the buildup is underneath.
Step 2: Switch off The Water Valve
Before removing a stuck shower head, we recommend you turn off the water, especially if you’re not familiar with plumbing.
Switching off the water supply will save you from leakage if the showerhead or shower arm breaks by mistake. Also, it prevents unnecessary spraying.
In most homes, the water valve is located in the basement just below the bathtub. But if you live in a condo or apartment, look behind the toilet or underneath the bathroom sink.
If you can’t find the turn-off water valve, consider talking to your property manager. Sometimes, multiple units can share the same water valve.
Step 3: Wrap Your Pliers
There’s no issue using a standard set of pliers to unscrew your showerhead. However, you will find your pliers more effective after wrapping their teeth with a plumber’s tape. If you don’t have tape, cover the bolts or nuts you want to open with a cloth before using the pliers.
By wrapping your pliers, you can prevent the plier’s teeth from scratching the shower head connector or plumbing nut and creating metal shavings.
Step 4: Set up Your Workspace
Since you will be working with a range of tools and harsh chemicals, it’s wise to protect your bathtub or shower.
Cover your bathtub or shower surface with a garbage bag, towel, plastic cloth, or work blanket. This way, all the falling debris, chemical, or screws will not cause any damage.
The cover will also prevent rust shaving and other small parts from going down the drain. But you can always block the drain opening with a washcloth.
Step 5: Remove The Showerhead
Having done the above, it’s time to get to the best part: removing the stuck showerhead. You can do this with tools or without tools.
Using Tools
- Using pliers or an adjustable pipe wrench wrapped with a plumber’s tape around its teeth, grip the fixture’s connector
- Tighten the pliers or wrench around the connector and turn it clockwise to loosen the mineral deposits or rust
- Once the showerhead breaks free, turn it counterclockwise to unscrew it
- Finish the unscrewing by hand to avoid stripping the original connector
Without Using Tools
If your attempt at removing the showerhead was unsuccessful, you might need to try a different approach. Sometimes, when the mineral buildup or rust is so serious, the showerhead might not loosen up easily. Fortunately, there are some effective methods to address this issue.
1. Use Vinegar
White vinegar is a natural cleaner that dissolves many substances, including rust or buildup, thanks to its high acidity levels. What’s more, it’s safe to use around children and pets.
You can use a versatile cleaning product to clean the calcium deposits and rust on your stuck showerhead. Just soak the showerhead in vinegar. It will eat away the corrosion.
If dealing with a hanging showerhead, soak it in a bucket or bowl of vinegar. For a showerhead attached to a wall or ceiling, fill a plastic bag with vinegar and secure it around the connector using an elastic hair tie.
Let the showerhead soak overnight to allow the vinegar to work through the entire connector. After the soak, try to loosen the showerhead with your hands. If it’s a bit stubborn, use a pipe wrench.
2. Calcium Lime Rust
If the first method fails, treat the showerhead with Calcium Lime Rust. This chemical works just as well as vinegar. But ensure you follow the instructions on the product packaging.
Apply the chemical and leave it for the dictated amount of time. Next, use a wire brush to clean off the chemical along with the rust or mineral debris. Wipe the fixture clean and try to unscrew the showerhead from the showerhead pipe.
3. Penetrating Lubricant
Still no success? Consider using penetrating lubricants like Liquid Wrench and WD-40.
- Coat the showerhead’s connector with penetrating lubricant and leave it for 2 hours
- Spray the lubricant for the second time and allow it to sit for 2 hours
- Try wiggling the connector or nut back and forth to move the lubricant around and see if it gives in
- Wrap the fixture’s connector with a leather or heavy cloth and grip it with pliers and a wrench
- Unscrew the showerhead
Don’t forget to protect your eyes and skin when using penetrating lubricants.
Step 6: Clean The Showerhead And The Pipe
After successfully removing the showerhead, you need to clean the showerhead and the pipe it is connected to.
First, clear any tape residue on the connector. Use a wire brush or steel sponge to get rid of calcium buildup and rust around the showerhead pipe threads.
Make sure you get inside the groves of the threads. This way, you can prevent corrosion or buildup when you re-attach the old showerhead or a new one. For resistant buildups, use vinegar or calcium lime remover.
If you plan to re-attach the removed showerhead, soak it in a small basin filled with vinegar and let it sit overnight. The vinegar will get rid of mineral deposits and rust.
The next day, run the showerhead under cold water to get rid of the vinegar. Inspect the showerhead for clues of calcification or corrosion.
If you observe any, apply a calcium lime rust to the showerhead and leave it for the allocated time. Once you’ve done that, burst off the product using a toothbrush or wire brush.
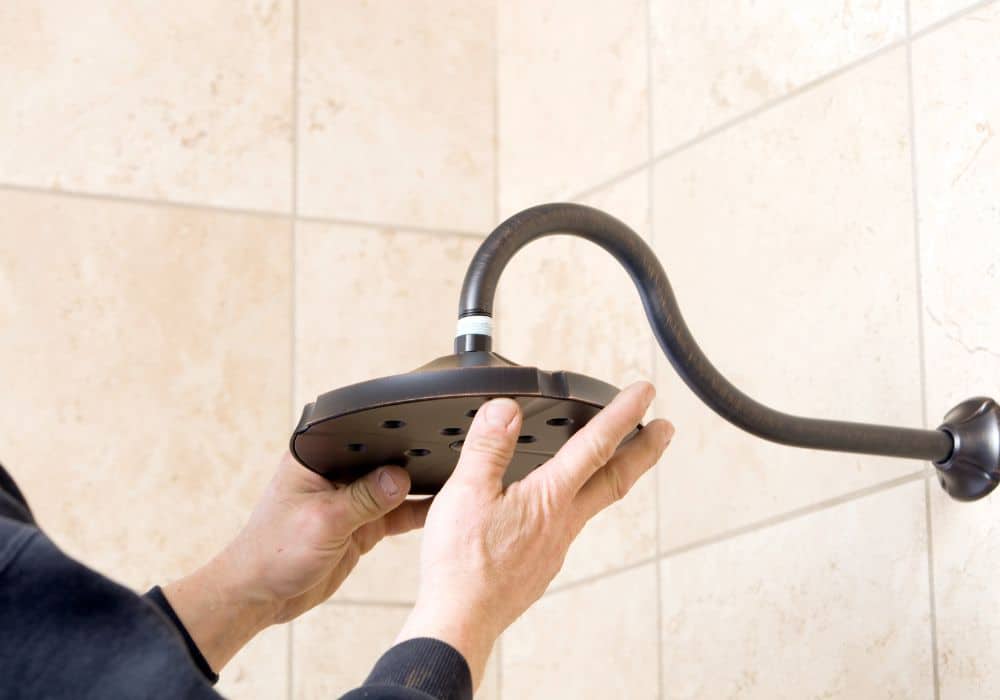
Step 7: Replace Or Re-attach The Showerhead
The last step is the re-installation of the original showerhead or the installation of a new showerhead. The steps below can help you complete this process:
- Wrap the connector threads with Teflon tape
Applying a plumber’s tape around connecting shower pipe helps to prevent leaks. Wrap two to three layers of Teflon tape around the shower arm’s thread in a clockwise pattern. Ensure you press the tape between the groves of the threads.
- Attach Your Showerhead
Mount your old or new showerhead to the showerhead arm and screw it in the clockwise direction until it’s secured tightly.
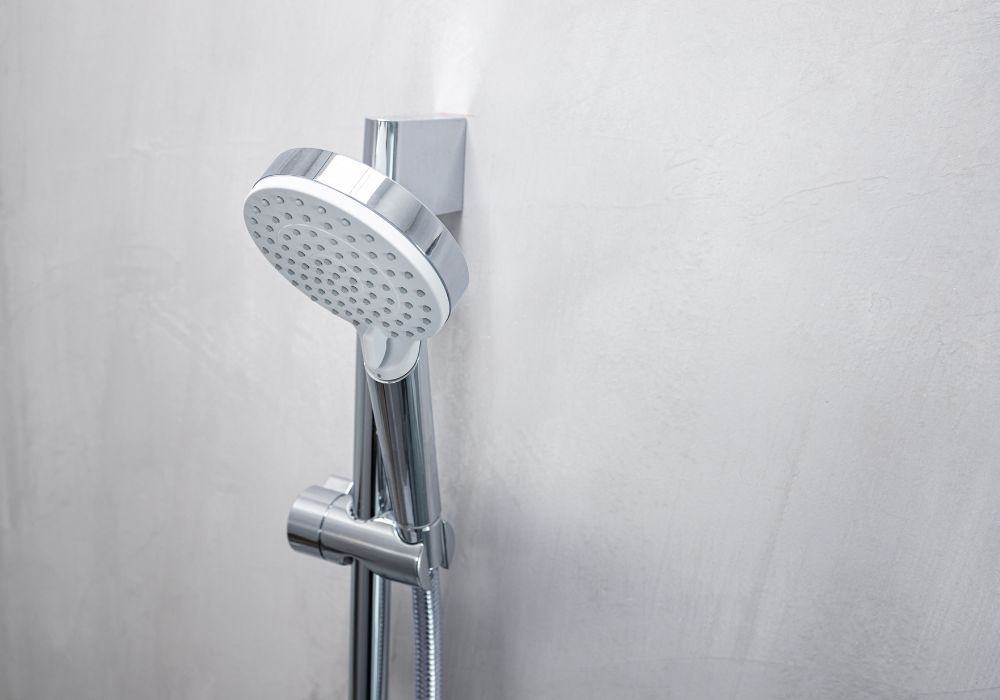
If you want to install a hand-held showerhead, attach one end of the hose to the showerhead base and tighten it by hand. Hook up the new showerhead to the other end of the hose.
- Turn On the Water Supply
Once you’ve completed every step, turn on the water supply and check for leaks. If you observe any connection leaks, tighten the fixture’s connector using an adjustable wrench or pliers until the leak stops.
If necessary, add the plumber’s tape to the shower arm. Also, use a heavy cloth to protect the showerhead finish when tightening.
How To Remove a Glued Showerhead?
Sometimes, the showerhead might get attached to the shower arm using glue. While it might be hard to remove this showerhead, it’s not impossible. The process below can help you.
- Create a mixture of hot water, vinegar, and lemon juice and pour it into a plastic bag
- Wrap the plastic bag around the showerhead and secure it with duct tape or a rubber band
- Let the bag sit there for 30 minutes or more, then remove it
- Rinse the showerhead with cold water and try to loosen the showerhead by hand or using pliers
- If the showerhead is still stubborn, repeat the process until the glue breaks down, and the fixture loosens.
Conclusion
As demonstrated above, mineral deposits and rust are the main culprits of a stuck showerhead. But this doesn’t mean you can’t remove your showerhead. It only means you need to put in more effort than you regularly do.
If you follow these steps, you will unscrew your stuck showerhead and install a new one hassle-free.
That’s all for today!
Are you ready to install a new showerhead? Tell us in the comment section.